Showing posts with label Cookies. Show all posts

Tuesday, February 8, 2011

Two (er, Three) Ingredient Pumpkin Cookies

The official pumpkin season may have passed, but I still have several cans in my pantry and am always in the mood for something pumpkiny. This past weekend I realized that my pantry also contained a spice cake mix that was about to expire so I figured that I would try to marry these two ingredients in some way. I knew that that it was possible to make a cake with just mix and a can of pumpkin, so I went looking in that direction on All Recipes and found these cookies instead.

Random side note: I get a lot of recipes from All Recipes and I always read the reviews before I make the recipe, but the reviews really tend to get on my nerves. People seem to make the recipes with all kinds of modifications and then complain how the recipe is terrible. This one is a perfect example - there are tons of reviews where people added eggs, oil, etc and then gave the recipe one star because the cookies didn't turn out right. They didn't turn out right because you made them wrong!!! (Okay, vent over.)

Anyhow, these cookies require just two ingredients - a spice cake mix and a 15 oz can of pumpkin. I added in chocolate chips because I love the combination of pumpkin and chocolate. I thought these cookies were great! They tasted almost identical to these Pumpkin Chocolate Chip cookies I make, but were much quicker and easier. They're rich and cakey and perfectly sweet. I served these cookies to my former boss and her husband when they came over to visit on Sunday afternoon and they were gobbled up.

Pumpkin Spice Cookies

1 (18.25 ounce) package spice cake mix
1 (15 ounce) can solid pack pumpkin

Preheat oven to 350 degrees F (175 degrees C). Grease cookie sheets.
In a large bowl, stir together the cake mix and pumpkin until well blended. Drop by rounded spoonfuls onto the prepared cookie sheet.
Bake for 18 to 20 minutes in the preheated oven. Allow cookies to cool on baking sheet for 5 minutes before removing to a wire rack to cool completely.

Wednesday, June 9, 2010

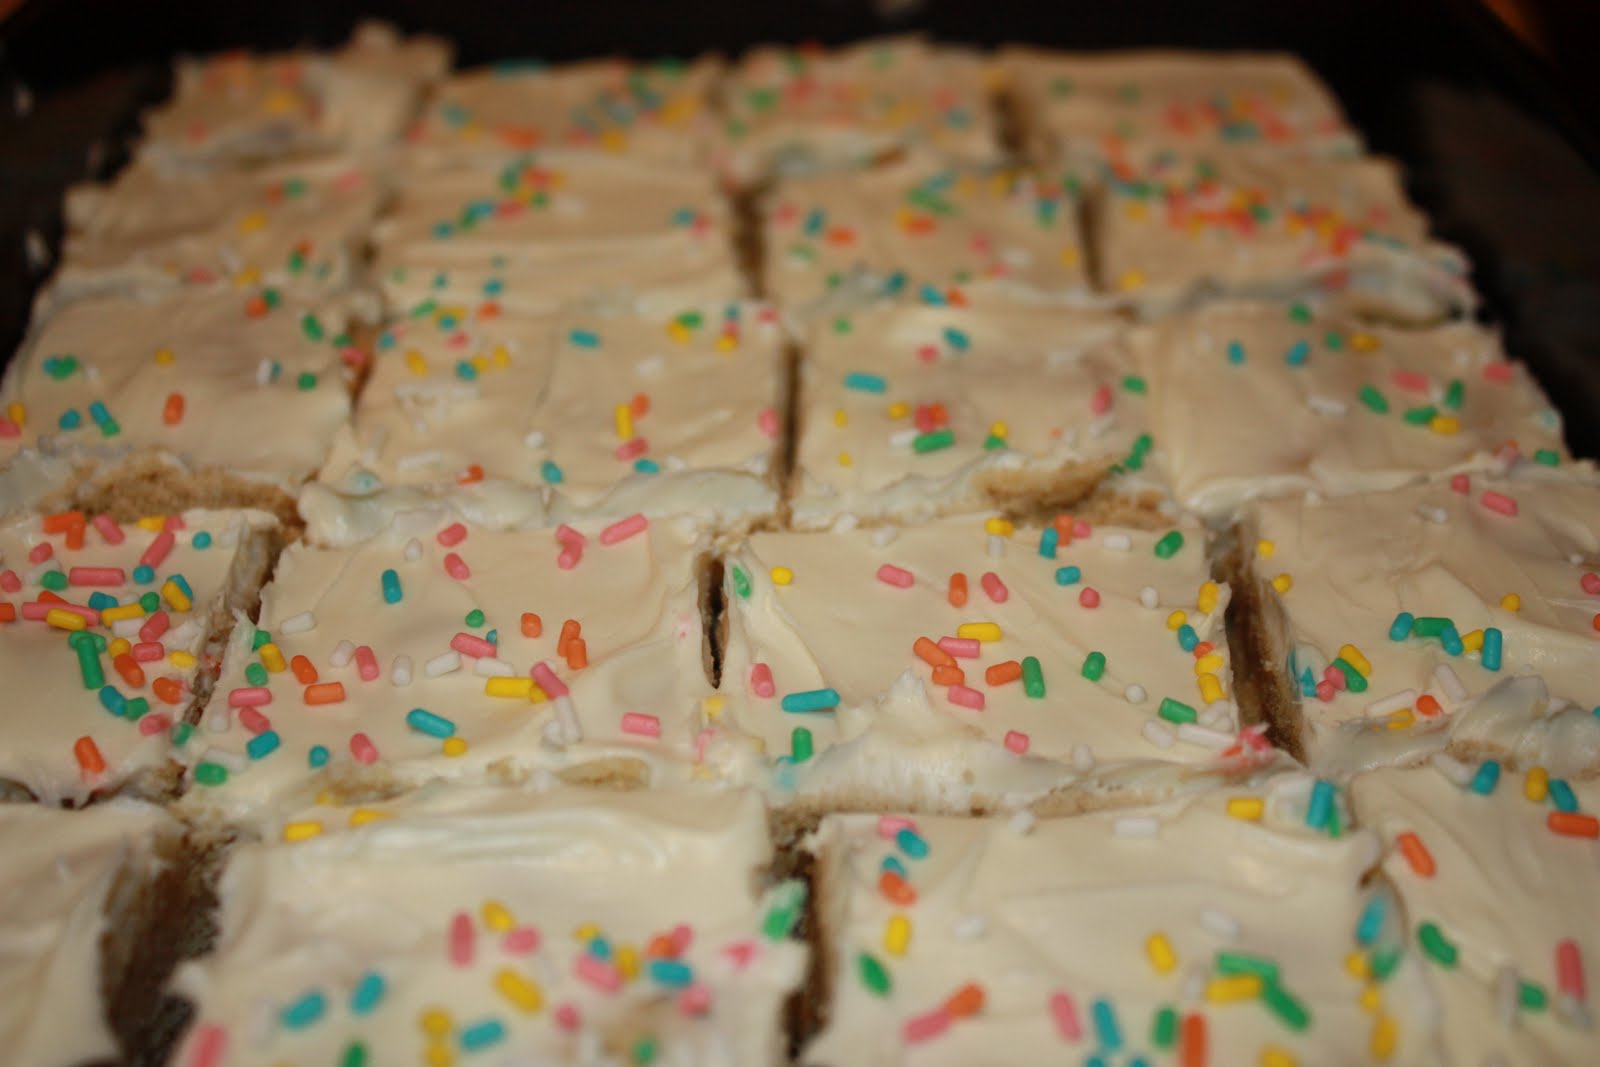
Sugar Cookie Bars

I've recently become a big fan of bar cookies. There's really no food I enjoy more than a good cookie, but I find that I rarely have the patience for pulling out the cookie sheets, scooping out the dough, cooling the cookies on racks, etc. But with a bar cookie, the steps are simple - mix the dough, press it into a pan, bake. Viola - cookies!

Sugar cookies are not typically my cookie of choice, but I had been looking into getting some decorated sugar cookies for Charlie and Lily's upcoming birthday party so they were on my mind. Then the other night I came across this recipe for Sugar Cookie Bars on Annie's blog and couldn't resist whipping them up.

First, let me say that this recipe makes a LOT of bars. I think I got almost 40 good-sized bars, so this recipe would be perfect for a summer barbecue or party. The bars came out tender and just slightly sweet. Annie suggested using vanilla bean and lemon zest in addition to the vanilla extract. I did not, since I had neither on hand (and I hate lemon) and I thought they were very good as they were - just like a normal sugar cookie. Instead of using the buttercream frosting that went along with this cookie recipe (I didn't have any powdered sugar), I cheated and used a can of Funfetti frosting from my pantry. The bars taste great this way, but I would like to try the frosting recipe next time, especially since I love buttercream. (And I'm including the buttercream recipe below in case you'd like to make it!)

These bars are tasty, simple and fun! I may become a sugar cookie convert after all.

Sugar Cookie Bars

For the cookie bars:
1 cup (2 sticks) unsalted butter, at room temperature
2 cups sugar
4 large eggs
2 tsp. vanilla extract
5 cups all-purpose flour
1 tsp. salt
½ tsp. baking soda

For the frosting:
1 cup (2 sticks) unsalted butter, at room temperature
1 tsp. vanilla extract
Pinch of salt
4 cups confectioners’ sugar, sifted
5 tbsp. milk
Food coloring (optional)

To make the cookies, preheat the oven to 350˚ F. Grease a 13 x 18″ rimmed baking sheet. Combine the butter and sugar in the bowl of an electric mixer. Beat on medium-high speed until light and smooth, about 2 minutes. Mix in the eggs one at a time, beating well after each addition and scraping down the sides of the bowl as needed. Blend in the vanilla. In a medium bowl, combine the flour, salt and baking soda. Stir together with a fork to blend. Add the dry ingredients to the mixer bowl and beat on low speed just until incorporated.

Transfer the cookie dough to the prepared baking sheet and press into an even layer. Bake 10-15 minutes, until light golden brown and a toothpick inserted in the center comes out clean. Transfer the pan to a wire rack and let cool completely before frosting.

To make the frosting, place the butter in the bowl of an electric mixer. Beat on medium-high speed until smooth, about 1 minute. Blend in the vanilla, salt, and confectioners’ sugar until smooth, 1-2 minutes. Mix in the milk. Tint as desired with food coloring. Spread over the cookie in the pan, cut into bars and serve.

Wednesday, September 2, 2009

Chocolate Chocolate Chip Cookies

Charlie and Lily have been in the NICU for a little over 2 months now. In this time we've really gotten to know many of their nurses well, and they are wonderful, wonderful women. To show our gratitude to them in some small way, I try to bake them treats at least once a week. Sometimes it's just brownies from a box, but when I have time I try to do something from scratch. These cookies were one of the first treats I made for them after I got out of the hospital and they were delicious! Rich and fudgy and chewy - a huge hit! I left out the nuts in case anyone was allergic and I added a cup of semisweet chocolate chips in addition to the white chips.

(The recipe is linked above, but I will add it to the post later. For some reason Blogger is refusing to let me copy and paste...)

Wednesday, January 28, 2009

My Favorite Chocolate Chip Cookie

Today was a snow day for Joe and I, and what better to do on a day like this than bake cookies? These Best, Big, Fat, Chewy Chocolate Chip Cookies definitely get a lot of face time on cooking blogs. Some people adore them and some find them overrated. I fall into the former category - I LOVE these cookies. They are by far my favorite chocolate chip cookie recipe. They come out just the way I like them - big and sturdy, soft in the middle and crisp on the edges. And loaded with chocolate! Two tips for making these cookies turn out fantastic - chill the dough for at least 2 hours in the fridge before baking and let the cookies cool completely on the cookie sheets. I think it's a combination of these two things that makes the cookies nice and chewy. Oh okay, and a third tip - make them big! They definitely lose something if you try to portion them smaller. I used my 1/4 cup ice cream scoop and recommend something similar! Definitely give these a try - even if they don't turn out to be your new favorites, you'll still have some kick-ass cookies!

Best, Big, Fat, Chewy Chocolate Chip Cookies

2 cups all-purpose flour
1/2 teaspoon baking soda
1/2 teaspoon salt
3/4 cup unsalted butter, melted
1 cup packed brown sugar
1/2 cup white sugar
1 tablespoon vanilla extract
1 egg
1 egg yolk
2 cups semisweet chocolate chips

Preheat the oven to 325 degrees F (165 degrees C). Grease cookie sheets or line with parchment paper. Sift together the flour, baking soda and salt; set aside. In a medium bowl, cream together the melted butter, brown sugar and white sugar until well blended. Beat in the vanilla, egg, and egg yolk until light and creamy. Mix in the sifted ingredients until just blended. Stir in the chocolate chips by hand using a wooden spoon. Cover dough and chill for 2 hours.
Drop cookie dough 1/4 cup at a time onto the prepared cookie sheets. Cookies should be about 3 inches apart. Bake for 15 to 17 minutes in the preheated oven, or until the edges are lightly toasted. Cool completely on baking sheet.


Sunday, December 21, 2008

Chocolate Chubbies


Chocolate and nuts - it's one of the greatest taste combinations, so you know these cookies have to be good. They are so loaded with goodies - chocolate chips, pecans and walnuts - that there are more mix-ins than dough. And that's okay! Speaking of dough, the dough for these cookies seemed awfully thin when I was done mixing it - it looked more like cake batter than cookie dough. So I added about 1/4 cup more flour and that seemed to help a bit. Plus I froze the dough and defrosted it about 2 weeks later to bake these, so that may have helped firm it up a bit.

These came out great - chewy and dense and full of all those delicious extras. I made them on the small side so they are like little brownie bites. They'll make a great chocolatey addition to your Christmas baking!

Chocolate Chubbies

6 (1-ounce) semisweet chocolate squares, chopped
2 (1-ounce) unsweetened chocolate squares, chopped
1/3 cup butter
3 large eggs
1 cup sugar
1/4 cup all-purpose flour
1/2 teaspoon baking powder
1/8 teaspoon salt
2 cups (12 ounces) semisweet chocolate morsels
2 cups coarsely chopped pecans
2 cups coarsely chopped walnuts

Combine first 3 ingredients in a heavy saucepan; cook, stirring often, over low heat until chocolate melts. Remove from heat; cool slightly.
Beat eggs and sugar at medium speed with an electric mixer until smooth; add chocolate mixture, beating well.
Combine flour, baking powder, and salt; add to chocolate mixture, stirring just until dry ingredients are moistened. Fold in chocolate morsels, pecans, and walnuts.
Drop batter by tablespoonfuls 2 inches apart onto lightly greased baking sheets.
Bake at 325° for 12 to 15 minutes or until done. Cool cookies on baking sheet 1 minute. Remove to wire racks; cool.

Wednesday, December 17, 2008

Butterscotch Gingerbread

I posted about these last Christmas, but I decided to feature them again because they are a unique addition to a cookie tray - something different from all the chocolate, mint and peanut butter that often dominates. These cookies are soft and spicy with the perfect balance of sweetness from the butterscotch chips. And they fill your kitchen with the most wonderful holiday-ish smell while baking. Give them a try!

Butterscotch Gingerbread

3 cups all-purpose flour
2 teaspoons baking soda
1 1/2 teaspoons ground cinnamon
1 1/2 teaspoons ground ginger
3/4 teaspoon ground cloves
1/2 teaspoon salt
1 cup butter or margarine
1 1/2 cups packed brown sugar
1 large egg
1/3 cup light molasses
1 (11 ounce) package butterscotch morsels

Preheat oven to 350 degrees F. Combine flour, baking soda, cinnamon, ginger, cloves and salt in small bowl. Beat butter, sugar, egg and molasses in large mixer bowl until creamy. Gradually beat in flour mixture until well blended. Stir in morsels. Drop by rounded tablespoon onto ungreased baking sheets. Bake for 9 to 11 minutes or until cookies are lightly browned. Cool on baking sheets for 2 minutes; remove to wire racks to cool completely.


Mint Chippers

It seems as if year after year I make the same cookies come Christmas time (see last year's Christmas cookie post for the usual suspects). They are all great cookies and I will be making some of them again this year, but I decided to give few new types a try as well. These mint chippers came to me by way of the My Recipes Cookie Countdown emails. Who doesn't like mint at Christmas time? Unfortunately, these didn't really live up to my expectations. They're okay, but definitely not minty enough. I would recommend upping the peppermint extract to at least a full teaspoon. The mint flavor is there, but it's a subtle background flavor. Definitely not what I was going for. These are okay, but not as exciting as I'd hoped. I used regular chocolate chips instead of the minis, but otherwise I stuck to the recipe. Aside from wishing there was more mint flavor, I also wish I had used some green food coloring - I feel like these are so plain looking! I guess I like my cookies with more pizazz.

Mint Chippers

1 cup (1/2 lb.) butter, at room temperature
1 1/4 cups powdered sugar
1/2 teaspoon peppermint extract
1/2 teaspoon vanilla
2 large egg whites
2 cups all-purpose flour
1/4 teaspoon salt
2/3 cup miniature chocolate chips or 4 ounces bittersweet chocolate, chopped

In a bowl, with a mixer on high speed, beat butter, powdered sugar, peppermint extract, and vanilla until well blended. Beat in egg whites until incorporated. Reduce speed and mix in flour, salt, and chocolate chips. Cover bowl with plastic wrap and chill until dough is firm but pliable, about 30 minutes.
With powdered sugar-dusted hands, shape dough into 1 1/2-inch balls, flattening each slightly between your palms to about 2 1/2 inches wide. Place 1 inch apart on buttered 12- by 15-inch baking sheets.
Bake in a 300° regular or convection oven until cookies feel firm to touch and are barely beginning to turn golden on the edges, 10 to 12 minutes. If baking more than one sheet at a time in one oven, switch positions halfway through baking. Transfer cookies to racks to cool completely.


Thursday, November 27, 2008

Chocolate Gooey Butter Cookies

Being a baker, I'd of course heard about Paula Deen's famous gooey butter cake recipe, although I had never tried it. I had never heard about gooey butter cookies, however, until I spotted this recipe on my friend Colleen's blog. My mom makes Thanksgiving dinner every year and never needs me to bring anything, but I always like to make a little something to add to the feast - usually a dessert. The only dessert my mom serves at our little Thanksgiving dinner is pumpkin pie, and since it's the only time of year I eat pumpkin pie, I don't mind that it's the only option. However, since I wanted to bake something, my mom asked for "something chocolate."

Side story: My sister LOVES pumpkin pie. Loves it. So my mom always makes a pie for us all to eat after dinner and a pie just for my sister. Each Black Friday morning you can find my sister staggering back up to her bedroom in her pjs carrying a whole pie, a fork and a can of whipped cream. I look forward to seeing it each year :)

Anyhow, back to the cookies. When my mom asked for her "something chocolate" I immediately thought of these cookies. I put the dough together Wednesday afternoon when I got home from work and baked them in them that night after dinner. These are SO easy - one bowl and five ingredients.

It is important to chill the dough for at least two hours, since it's very soft and you need to be able to roll them into balls. Mine rolled just fine and I covered some in powdered sugar as per the recipe, but I also rolled some in walnuts and some in coconut, since my mom and Nana are big coconut fans. These cookies also allowed me to use my the new sugar sifter I got from Jenny in the last What's Cooking gift exchange - thanks Jenny!

These are great cookies. Super chocolatey, soft and moist. Joe said they tasted like "pudding in cookie form." Give these a try when you're looking for a simple chocolate treat. Happy Thanksgiving!

Chocolate Gooey Butter Cookies

1 (8 ounce) brick cream cheese, room temperature
1 stick butter, room temperature
1 egg
1 teaspoon vanilla extract
1 (18 ounce) moist chocolate cake mix
confectioners'/powdered sugar, for dusting

Preheat oven to 350 degrees F.In a large bowl with an electric mixer, cream the cream cheese and butter until smooth. Beat in the egg. Then beat in the vanilla extract. Beat in the cake mix.Cover and refrigerate for 2 hours to firm up so that you can roll the batter into balls. Roll the chilled batter into tablespoon sized balls and then roll them in confectioner's sugar. Place on an ungreased cookie sheet, 2 inches apart. Bake 12 minutes. The cookies will remain soft and "gooey." Cool completely and sprinkle with more confectioners' sugar, if desired.

Tuesday, October 7, 2008

Does a body good


For those of you unfamiliar with biotechnology (what, you're NOT familiar with biotechnology?), the funny little "Y" symbol above represents an antibody. It's also my company's logo. And for those of you unfamiliar with township zoning laws, it is really, really, really hard to get approval to put something as simple as a little Y-shaped antibody on the side of a building. I should know, because I've been working for months to get approval for my company to put that little sucker up. Yesterday I managed to score a meeting with the township officials to review my application and decided that I would try to win their favor with cookies. Anybody who knows me knows that if they want to win me over (or apologize to me, cheer me up, express their love, etc.) they should give me some cookies - right Joe? So I figure that all people can be bought with cookies.

I didn't want to bring just any cookies to my meeting though - I wanted to be memorable! So I spent Sunday making antibody shaped sugar cookies to bring to my meeting. And I have to say, I'm quite proud of how they turned out:


I made an antibody-shaped template from an index card and cut the shape out of Pillsbury sugar cookie dough. For the frosting, I wanted something that would harden nicely so I could transport my cookies easily. I found this recipe on All Recipes and it was perfect. I halved it since I only had about 15 cookies to ice (the below is for the full recipe). I used M&Ms to complete the treats - teal ones that I had left over from my company holiday party and black ones that I picked from a bag of Halloween M&Ms. I like to think that the township people were impressed with my creativity and wit - I was! ;)

Sugar Cookie Frosting

4 cups confectioners' sugar
1/2 cup shortening
5 tablespoons milk
1 teaspoon vanilla extract
food coloring (I left it white)

In a large bowl, cream together the confectioners' sugar and shortening until smooth. Gradually mix in the milk and vanilla with an electric mixer until smooth and stiff, about 5 minutes. Color with food coloring if desired.

Sunday, September 7, 2008

Chocolate Chip Cookies in a Cookie

What's the one thing that could make a chocolate chip cookie better? The addition of MORE chocolate chip cookies! This recipe, from Big Fat Cookies, instructs you to prepare your cookie dough and bake off 10 cookies. Once baked and cooled, those cookies are mixed back into the remaining dough for a thick and unique almost twice-baked chocolate chip cookie. This recipe also helps solve the dilemma of whether to make crispy or chewy chocolate chip cookies - it gives you both! The giant soft cookie has little bites of crispy cookies throughout - the best of both worlds. Once the baked cookies are mixed back in, this recipe produces the best-tasting cookie dough I've ever eaten. And it also bakes some of the most delicious cookies to come out of my kitchen. These were a hit! Why didn't anyone think of this before?!?

Chocolate Chip Cookies in a Cookie

2 cups all-purpose flour
1 tsp baking soda
1/2 tsp salt
1 cup (2 sticks) unsalted butter at room temperature
1 cup light brown sugar
1/2 cup granulated sugar
2 large eggs
2 tsp vanilla extract
3 cups semisweet chocolate chips

Position a rack in the middle of the oven and preheat to 350. Line two baking sheets with parchment paper.
Sift the flour, baking soda and salt in a medium bowl and set aside. In a large bowl using an electric mixer on medium speed, beat the butter, brown sugar and granulated sugar until blended, about 1 minute. Stop the mixer and scrape the sides of the bowl as needed during mixer. Add the eggs and vanilla and mix until blended, about 1 minute. On low speed, add the flour mixture, mixing just until it is incorporated. Mix in the chocolate chips.
Drop 10 heaping tablespoons of dough 3 inches apart onto one of the prepared baking sheets. Set aside the remaining dough. Bake until the edges of the cookies are lightly browned but the centers are golden, about 13 minutes. Cool the cookies on the baking sheets for 5 minutes and then transfer to a wire rack to cool completely.
Break the cooked cookies into 1/2 to 1 inch pieces. Add the pieces to the reserved dough and mix on low speed to distribute them evenly, about 10 seconds.

Using an ice cream scoop or measuring 1/4 cup, scoop mounds of dough onto prepared baking sheets, spacing 3 inches apart. Bake the cookies until they feel firm on top but are still soft in the center and the edges are beginning to brown slightly, about 15 minutes. Cool the cookies on the baking sheets 10 minutes, then transfer to a wire rack and cool completely.
The cookies can be stored in a tightly covered container at room temperature for up to four days.
Makes 20 cookies (or 18, if you eat 2 cookies worth of dough like I did)

Saturday, August 30, 2008

Cookie Carnival: Chocolate Hazelnut Biscotti

I am a cookie lover and have baked quite a wide variety over the years, however I had not attempted to make biscotti before so I was excited to see that it was chosen as the Cookie Carnival cookie for August. The recipe just sounds so good it was hard to resist - chocolate and hazelnuts? Yum! I really enjoyed making these - it was exciting to see the logs rise up in the oven and then slicing into them for the second baking. Plus they smelled amazing in the oven - I made these hours ago and my house still smells like warm chocolate. I took these to a family dinner tonight and they were a huge hit. In fact, at the end of the evening Joe's grandmother started wrapping a few extra pieces in a napkin to sneak home to have with her coffee tomorrow. I caught her - and gave her all the leftovers. How can I deny anyone something so yummy? As you can see, they were irresistible to everyone...

I followed the recipe exactly since it was my first attempt at biscotti and I will definitely make these (and other types of biscotti) again soon!

Chocolate Hazelnut Biscotti


1 1/2 cups hazelnuts, toasted, husked (I used chopped)
3 cups all purpose flour
2/3 cup unsweetened cocoa powder
1 teaspoon baking soda
1 teaspoon baking powder
1/2 teaspoon salt
1 cup (2 sticks) unsalted butter, room temperature
2 cups sugar
3 large eggs
1 1/2 teaspoons vanilla extract
1/2 teaspoon almond extract
1 cup semisweet chocolate chips (I used mini)

Preheat oven to 350°F. Line heavy large baking sheet with parchment paper. Grind 1/2 cup toasted hazelnuts in processor. Set aside. Whisk flour, cocoa, baking soda, baking powder and salt in large bowl. Beat butter and sugar in another large bowl to blend. Add eggs and vanilla and almond extracts and beat until well blended. Beat in flour mixture. Mix in 1 cup whole toasted hazelnuts, chocolate chips and 1/2 cup ground hazelnuts.
Divide dough into 2 equal pieces. Shape each piece on baking sheet into 2 1/2-inch-wide by 14-inch-long log. Place logs on prepared baking sheet, spacing 2 1/2 inches apart (logs will spread during baking). Bake until logs feel firm when tops are gently pressed, about 35 minutes. Cool logs on baking sheet 15 minutes. Maintain oven temperature.
Using long wide spatula, transfer baked logs to cutting board. Using serrated knife, cut warm logs crosswise into 1/2-inch-thick slices.
Arrange slices, cut side down, on 2 baking sheets. Bake biscotti until firm, about 15 minutes. Transfer to racks and cool completely. (Chocolate Hazelnut Biscotti can be prepared ahead. Store in airtight container up to 4 days, or wrap in foil and freeze in resealable plastic bags up to 3 weeks.)

Saturday, June 21, 2008

Cookie Carnival: Snickerdoodles

I was both disappointed and excited to learn that snickerdoodles were the first cookie I'd be making for the Cookie Carnival blogging event. Disappointed because I've made snickerdoodles many times in the past and was hoping for a chance to try something new, and excited because the only time I ever really make snickerdoodles is Christmas, so it gave me a chance to make these yummy cookies even though it's summer. I followed the recipe exactly because I didn't have much time to experiment and they came out great. Nice and chewy with the perfect mix of sugar and spice from the cinnamon. I bagged them up and plan to sell them at a fundraiser my pet rescue group is holding tomorrow. And I can't wait to continue to try new recipes through Cookie Carnival!
Snickerdoodles
2 3/4 cups all-purpose flour
2 teaspoons cream of tartar
1 teaspoon baking soda
1/4 teaspoon salt
8 tablespoons (1 stick) unsalted butter
1/2 cup pure vegetable shortening
1 3/4 cups sugar, plus more if needed
2 tablespoons ground cinnamon, plus more if needed
2 large eggs

Preheat the oven to 400 degrees, with one rack in top third and one rack in bottom third of oven. Line baking sheets with Silpat baking mats or parchment paper; set aside.
Sift together flour, cream of tartar, baking soda, and salt; set aside. In the bowl of an electric mixer fitted with a paddle attachment, combine butter, shortening, and 1 1/2 cups sugar. Beat on medium speed until light and fluffy, about 2 minutes. Scrape down sides of bowl. Add eggs, and beat to combine. Add dry ingredients, and beat to combine.
In a small bowl, combine remaining 1/4 cup sugar and the ground cinnamon. Use a small (1 1/4-ounce) ice-cream scoop to form balls of the dough, and roll in cinnamon sugar. Place about 2 inches apart on the prepared baking sheets. Bake until the cookies are set in center and begin to crack (they will not brown), about 10 minutes, rotating the baking sheets after 5 minutes. Transfer the sheets to a wire rack to cool about 5 minutes before transferring the cookies to the rack. Store in an airtight container up to 1 week.

Wednesday, April 9, 2008

Cookies on a whim

I had no intention of baking anything tonight. I planned to hit the gym, eat dinner and lounge on the couch with America's Next Top Model. However, while browsing one of my favorite blogs, Cookie Madness, I came across these cookies and was overcome with the urge to bake them. Immediately. I had all the ingredients at home, and it seemed like the perfect opportunity to use up one of the chocolate bunnies I had left over from Easter. I still went to the gym and had dinner, but instead of bonding with ANTM (which was a recap show anyway, hmph) I made these cookies. Joe and I enjoyed them - they were a little crunchier that I prefer (I love my cookies nice and soft) but they were a great treat for a Wednesday evening.

One Bowl Peanut Butter & Milk Chocolate Cookies

4 tablespoons unsalted butter, room temp
1/4 cup brown sugar, packed
1/4 cup granulated sugar
1/2 cup extra crunchy peanut butter
1/4 teaspoon vanilla extract
1 egg1/8 teaspoon salt
1/4 teaspoon baking soda
3/4 cup all purpose or white whole wheat flour (95 grams)
15 miniature peanut butter cups, frozen and chopped or 3-4 oz milk chocolate (I used a medium-sized solid chocolate rabbit)

Preheat oven to 350 degrees F.
In a mixing bowl, beat together butter and both sugars. You can use an electric mixer, but I used a spoon. Beat in the peanut butter, vanilla, baking soda and salt. Beat vigorously and thoroughly to distribute baking soda and salt, scraping sides as you go, then add the egg and beat just until it is mixed in. Add the flour and stir, do not beat, until it is absorbed, then mix in the cups.
Using a small cookie scoop (2 tsp) or a rounded teaspoon, drop dough onto two ungreased cookie sheets, 10-12 cookies to a sheet. Flatten tops slightly. Bake on center rack, one sheet at a time for 12 minutes or until cookies appear set.

Makes 20-24 cookies (Anna clearly shows more restraint than I when sizing her cookies - I only got 11!)


Wednesday, March 12, 2008

...and a cookie for my hundreth

It only seemed fitting that my 100th post be about my all-time favorite food and blog namesake, the cookie. I was in the mood tonight for some fresh baked cookies and decided to finally try the much discussed and duplicated Soft Chocolate Chip Cookies from Joelen on the What's Cooking board. I used french vanilla pudding mix and added milk chocolate chips, M&Ms and pecan chips. And now, a confession. I had half a large bag of Christmas M&Ms that I wanted to use up but I didn't want to feature holiday-looking cookies in this post. So I picked out all the red M&Ms and used only the green - it's almost St. Patrick's Day after all ;) These cookies are nice and soft and the pudding mix adds a nice vanilla hint to the cookie. So here's to my 100th post - have a cookie!

Soft Chocolate Chip Cookies

2 1/4 cups all-purpose flour
1 teaspoons baking soda
1 cup butter, softened
3/4 cups packed brown sugar
1/4 cup white sugar
1 (3.4 ounce) packages instant vanilla pudding mix
2 eggs
1 teaspoon vanilla extract
2 cups semisweet chocolate chips (I used milk chocolate chips, M&Ms and pecans)

Preheat oven to 350 degrees F (175 degrees C). Sift together the flour and baking soda, set aside.In a large bowl, cream together the butter, brown sugar, and white sugar. Beat in the instant pudding mix until blended. Stir in the eggs and vanilla. Blend in the flour mixture. Finally, stir in the chocolate chips. Drop cookies by rounded spoonfuls onto ungreased cookie sheets.Bake for 10 to 12 minutes in the preheated oven. Edges should be golden brown.

Monday, February 11, 2008

Love Bites

For Joe's faculty meeting this month I wanted to make something a little Valentine's Day-ish but I didn't want to buy a lot of ingredients. Right after Christmas I had picked up a bag of Dark Chocolate Mint Truffle Hershey's Kisses on clearance because I thought they sounded delicious (and they are, they taste just like Andes mints, which I adore). But I didn't need to eat the whole bag myself, so I thought I would use them up and make the recipe for Mint Capped Brownie Cookie Cups that was on the back of the kiss bag. I added some red sprinkles and candy hearts for decoration - a little nod to the holiday is better than none, right? These are very tasty and simple to make. I finally got to use my mini muffin tins, and I loved them for this recipe because it helped me with portion control (I tend to make giant cookies and then I don't get as many out of my recipes) and allowed me to bake all 48 cookies at one time. The chocolate and mint go wonderful together, but you could use any flavor Kiss you like - and with all the new flavors they keep unveiling you have a wide variety to choose from!

Mint Capped Brownie Cookie Cups

48 Hershey's Kisses brand Dark Chocolate Mint Truffles
2/3 cup butter or margarine, softened
1 1/4 cups granulated sugar
1 tablespoon water
1 tablespoon vanilla extract
2 eggs
1 1/2 cups all-purpose flour
1/2 cup Hershey's cocoa
1/2 teaspoon salt
1/4 teaspoon baking soda
Powdered sugar (optional)

Heat oven to 350 and line 48 small muffin cups with paper or foil baking liners. (I just sprayed the tins with non-stick spray and they were fine.) Remove wrappers from chocolates.
Beat butter, granulated sugar, water and vanilla in a large bowl on medium speed until well blended. Add eggs; beat well.
Stir together flour, cocoa, salt ang baking soda. Gradually add to sugar mixture, beating on low just until blended. If necessary, refrigerate until firm enough to handle. Shape dough into 1-inch balls and place in prepared muffin cups. (I did not refrigerate the dough and just spooned the dough into the cups free-form.)
Bake for 11 to 13 minutes or until cookie surface is set. Cookies will appear soft and moist - do not overbake. Cool about five minutes in muffin cups on wire rack. Press Kiss into surface of each cookie cup. Cool completely in pan on wree rack. Sprinkle each cooke with powdered sugar, if desired.

Saturday, January 12, 2008

Small Batch Baking: Cheesecake Toffee Drops

As a Christmas gift this year I received the Small Batch Baking cookbook (thanks, Margot!) and was instantly intrigued. It seemed like the perfect cookbook for me - I love to bake but I hate having tons of the finished product sitting around the house. Okay, let me rephrase that - I LOVE having tons of the finished product sitting around the house, but my hips and thighs do NOT. All the recipes in this cookbook are scaled down to make 2-3 servings of baked goods- two large muffins, 3 brownies, 2 mini cakes, etc. - perfect for making Joe and I evening treats. I was excited to try out a recipe and see how it went.

Cookies are my favorite treat of all, so I decided to make the Cheesecake Toffee Drops from the book. It was strange working with such small amounts while baking - 1/3 cup flour, 1 tablespoon butter, and my tiny bowl of resulting dough was funny, but it produced six good-sized cookies. The texture of these cookies was a little strange - they were moist and springy, as Joe observed, almost like the tops of muffins. It wasn't until re-typing the recipe for this post that I realized WHY the texture was off - I added 1 whole beaten egg as opposed to the 1 TEASPOON of beaten egg the recipe called for. Whoops. Guess I really do need to get used to working with smaller amounts! Regardless of the texture, these cookies were tasty! Not overly sweet and satisfying. I used Heath bar baking bits, since I had them on hand, and also added a few handfuls of milk chocolate chips. I will definitely be trying out more recipes from this book - I mean, who wouldn't want to make mini layer cakes in 15 oz soup cans?!?!

Cheesecake Toffee Drops

1/3 cup all purpose flour
1/8 teaspoon baking soda
Pinch of salt
1/4 cup firmly packed light brown sugar
2 tablespoons cream cheese, at room temperature
1 tablespoon unsalted butter, at room temperature
1 teaspoon well-beaten egg or egg substitute
1/4 teaspoon vanilla extract
1/4 cup chopped chocolate-covered toffee bar (such as Heath or Skor) (I used Heath baking bits)
I also added some milk chocolate chips
Place rack in center of oven and preheat to 300 degrees. Set aside an ungreased baking sheet. Place the flour, baking soda and salt in a small bowl and whisk to blend. Place the butter, brown sugar and cream cheese in a medium-size bowl and beat on medium speed until smooth. Add the beaten egg and vanilla, and beat on medium speed until dough is light in texture, about 20 seconds. Scrape down the sides of the bowl and add the flour mixture. Beat on low speed until the dry ingredients are blended in. Stir in the toffee with a wooden spoon. Drop the cookie batter by rounded tablespoonfuls onto the baking sheet, spacing them 1 1/2 to 2 inches apart (thanks to my extra egg, I think mine spread out more than they should have!). Bake until the cookies appear dry and golden, 20-25 minutes. Remove the baking sheet from the oven and immediately transfer cookies to a wire rack, cool completely.
Makes 6 cookies, serves 2 or 3

Monday, January 7, 2008

Fun(fetti) Little Cookies

It seems like everyone loves Pillsbury's Funfetti cake mix - toss some sprinkles into cake batter and you have a winner! Who knew? I've made Funfetti as cakes and cupcakes before, but had yet to try them in their lesser-known form - as cookies! Joe has a department meeting today and I always like to send in treats for his coworkers to enjoy while they meet, so I thought I would give the Fufetti cookies a try. They are super easy and come out tasting just like the cupcakes. I frosted mine with Pillsbury Milk Chocolate frosting and topped with sprinkles and candy stars and just followed the recipe on the cake mix box.

Funfetti Cookies

1 (18.9-oz.) pkg. Pillsbury® Moist Supreme® Funfetti® Cake Mix
1/3 cup oil
2 eggs
1/2 (15.6-oz.) can Pillsbury® Creamy Supreme® Funfetti® Vanilla Frosting (I used chocoalte)
Heat oven to 375°F. In large bowl, combine cake mix, oil and eggs; stir with spoon until thoroughly moistened. Shape dough into 1-inch balls; place 2 inches apart on ungreased cookie sheets. With bottom of glass dipped in flour, flatten to 1/4-inch thickness.

Bake at 375°F. for 6 to 8 minutes or until edges are light golden brown. Cool 1 minute; remove from cookie sheets.

Spread frosting over warm cookies. Immediately sprinkle each with candy bits from frosting. Let frosting set before storing. Store in tightly covered container.

Sunday, December 30, 2007

Just add sugar

In my book, any cookie recipe that involves rolling the dough in sugar before baking has to be good. And when that recipe also contains peanut butter and chocolate, it has to be fantastic. I found this recipe on I Pray to Gouda and with the rave review Faith gave I knew I had to make these cookies. I had given away all of my Christmas cookies, and on Sunday I was wishing I hadn't because I really wanted a cookie. I decided it was the perfect time to try out this recipe - I baked 8 cookies and froze the rest of the dough for later. These suckers are good! I mainly love all cookies, but I am not really a fan of crunchy cookies - I like mine soft and chewy. I tend to think of peanut butter cookies as crunchy, but these were nice and tender and stayed that way. When your holiday baking finally disappears and you find yourself craving cookies, give these ones a try!

Sugar-Dipped Chocolate and Peanut Butter Chip Cookies

1/4 cups flour
3/4 tsp. baking soda
1/2 tsp. baking powder
1/4 tsp. salt
1/2 cup unsalted butter, softened
1 cup peanut butter at room temp
3/4 cup sugar, leave some aside for dipping
1 large egg, at room temp
1 TB milk
1 tsp. vanilla extract
1/2 cup peanut butter chips
1/2 cup chocolate chips

Preheat oven to 350 degrees. In a large bowl, combine the flour, baking soda, baking powder and salt. Set aside.In a large bowl, beat the butter and the peanut butter and beat until smooth. Add egg and mix well. Add milk and vanilla extract. Add flour mixture and beat thoroughly. Mix in sugar. Stir in peanut butter chips and chocolate chips. Place sprinkling sugar on a plate. Drop by rounded teaspoonfuls into the sugar, then onto ungreased cookie sheets. Using fork, lightly indent with a crisscross pattern, but don't overly flatten the cookies. Bake for 10-12 minutes.The cookies won't look done, but they are. Let them cool on the sheets for 1 minute, then remove to a rack to cool completely.

Sunday, December 16, 2007

"C" is for Cookie and Christmas!


It's that time of year again - holiday cookie time! I love to bake cookies at Christmas time and pass them out to friends and co-workers. This year, I must say, was my easiest baking experience yet. Thanks to my new silipat mat (thank you, secret santa!), my mom's awesome cookie sheets and my new baking racks, I had zero burnt, stuck or broken cookies. And they all taste great too. I made four types of cookies - peanut blossoms, butterscotch gingerbread, snickerdoodles, monster cookies.

Peanut Blossoms

These are just a Christmas classic. My mom always made these at Christmas when I was growing up so I just associate them with the holiday. I used the classic recipe from Hershey's and a nice bag or pre-unwrapped Hershey's Kisses - a most excellent creation!

48 HERSHEY'S KISSES Brand Milk Chocolates
1/2 cup shortening
3/4 cup REESE'S Creamy Peanut Butter
1/3 cup granulated sugar
1/3 cup packed light brown sugar
1 egg
2 tablespoons milk
1 teaspoon vanilla extract
1-1/2 cups all-purpose flour
1 teaspoon baking soda
1/2 teaspoon salt
Granulated sugar

1. Heat oven to 375°F. Remove wrappers from chocolates. 2. Beat shortening and peanut butter in large bowl until well blended. Add 1/3 cup granulated sugar and brown sugar; beat until fluffy. Add egg, milk and vanilla; beat well. Stir together flour, baking soda and salt; gradually beat into peanut butter mixture. 3. Shape dough into 1-inch balls. Roll in granulated sugar; place on ungreased cookie sheet. 4. Bake 8 to 10 minutes or until lightly browned. Immediately press a chocolate into center of each cookie; cookie will crack around edges. Remove from cookie sheet to wire rack. Cool completely. About 4 dozen cookies.

Butterscotch Gingerbread

This recipe came from All Recipes and I've been making them at Christmas for years. I like them because they are different from your typical Christmas cookie fare, but still seasonal thanks to the gingerbread flavor. The butterscotch morsels make them very sweet.

INGREDIENTS
3 cups all-purpose flour
2 teaspoons baking soda
1 1/2 teaspoons ground cinnamon
1 1/2 teaspoons ground ginger
3/4 teaspoon ground cloves
1/2 teaspoon salt
1 cup butter or margarine
1 1/2 cups packed brown sugar
1 large egg
1/3 cup light molasses
1 (11 ounce) package NESTLE® TOLL HOUSE® Butterscotch Flavored Morsels

DIRECTIONS
PREHEAT oven to 350 degrees F.
COMBINE flour, baking soda, cinnamon, ginger, cloves and salt in small bowl.
BEAT butter, sugar, egg and molasses in large mixer bowl until creamy. Gradually beat in flour mixture until well blended. Stir in morsels. Drop by rounded tablespoon onto ungreased baking sheets.
BAKE for 9 to 11 minutes or until cookies are lightly browned. Cool on baking sheets for 2 minutes; remove to wire racks to cool completely.

Monster Cookies

Aside from a nice chewy chocolate chip cookie, monster cookies are my absolute favorite. Peanut butter, chocolate chunks, M&Ms - how can you go wrong? There are many variations of this recipe and you can really add any mix-ins you like, but I prefer to limit mine to chocolate! The recipe I use came from a friend many years ago, so I'm not really sure where it originated. It's a great one though!

2 eggs
1 cup packed brown sugar
2/3 cup white sugar
3/4 tsp. vanilla extract
3/4 tsp. corn syrup
1 1/4 tsp. baking soda
1/3 cup butter
1 cup peanut butter
3 cups rolled oats
2/3 cup chocolate chunks (I use 1 1/2 cups)
2/3 cup plain M&Ms (I use 1 1/2 cups)


Preheat oven to 350. In a large bowl, beat the eggs until fluffy. Beat in the next six ingredients, through peanut butter. Stir in the oats, chocolate and M&Ms. Scoop onto a large baking sheet and bake 12-15 minutes.

Snickerdoodles

Another holiday classic. I toss these in each year for those people who don't like chocolate or peanut butter. And again, they just scream "Christmas" to me. There are a ton of variations on this recipe - the one I use has been in my recipe binder for several years. Can't say where it came from, but it makes really good cookies!

1 cup shortening
1 1/2 cups sugar
2 eggs
2 3/4 cups flour
1/2 tsp. cream of tartar
1 tsp. baking soda
1/2 tsp. salt
2 tbl. sugar
2 tsp. ground cinnamon

Preheat oven to 375. In a medium bowl cream together shortening, sugar and eggs. Sift together flour, cream of tartar, baking soda and salt in a bowl; add to the creamed mixture, beating well. Form dough into 1-inch balls, roll in sugar and cinnamon mixture. Bake 8-10 minutes or until puffed. Cool completely on wire racks.

Monday, December 3, 2007

You just can't go wrong


with peanut butter and chocolate. Seriously, I don't think anything with that combination can be bad. Recently Nestle baking chips were on sale at our grocery store so I asked Joe to pick me up a variety when he was shopping. One of the types he came home with was chocolate peanut butter swirl. I knew I wanted to make cookies with them, so I looked to the back of the chip bag for inspiration. Unfortunately, there was no inspiration there - the featured recipe was just a regular old chocolate chip cookie using the swirl chips instead of plain chocolate chips - boring! I felt that the peanut butter chips called for a chocolate cookie, so I did some searching and found this recipe on Cookie Madness and thought it sounded perfect. My changes are indicated in the recipe below. I used butter instead of margarine and, of course, my swirl chips. I was about to chop up some peanuts and add them too, but then I remembered a half-full bag of Reese's Pieces I had left from a trip to the movies a few weeks ago and decided to add them instead. Mmmmmmm. These cookies are fantastic. Chewy and chocolaty with perfect peanut butter flavor in every bite. Joe ranked them in his ever-changing Top 5 of things I cook or bake, and since 2 of those 5 things contain peanut butter and chocolate, I think I've proved my above point!

Peanut Butter Chip Chocolate Cookies
1 cup butter or margarine, softened
1 1/2 cups sugar
2 eggs
2 teaspoons vanilla
2 cups unsifted all purpose flour
2/3 cup Hershey’s unsweetened cocoa powder
3/4 teaspoon baking soda
1/2 teaspoon salt
1 bag Nestle chocolate peanut butter swirl chips
1/4 cup Reese's Pieces candies

Cream butter or margarine, sugar, eggs and vanilla until light and fluffy. Combine flour, cocoa, baking soda and salt; add to creamed mixture. Stir in peanut butter chips. Drop by teaspoonfuls onto ungreased cookie sheet, or chill until firm enough to handle and shape small amounts of dough into 1 inch balls. Place on ungreased cookie sheet. Bake at 350 degrees f for 8-10 minutes.

Cool 1 minute before removing from cookie sheet onto wire rack. About 5 dozen.
PS - Joe, fresh out of a Photoshop course, has decided to copyright all my pictures with a little stamp of our dog Tucker's head. So when you see Tucker staring back at you from my photos, you'll know why!