Monday, March 14, 2011

Chicken & Broccoli Braid

I like to think that I'm fairly smart. I graduated college with honors, have held down good jobs, and can hold a reasonably intelligent conversation when need be. However, this little recipe had me completely and utterly baffled.

I had several Pampered Chef shows scheduled for this past week, and the host of the show I was doing Friday requested that I make this Chicken and Broccoli Braid at her show. Being that I've never made it before, I figured that it would be a good idea to make it at home first so that I could put it together easily at the show. Boy, am I glad I did! I got started with the recipe. Mix up the feeling - easy! Roll out the crescent roll dough - easy! Braid the dough - um....what? I must have read the instructions 10 times and STILL couldn't figure out how to make the braid. I finally did what any truly "smart" person would do - I went to You Tube and watched this demo. *cue light bulb over head* Aaahhh! Once I saw the braid done, I realized how incredibly easy it really was. I braided my dough, stuck it in the oven, and was rewarded with cheesy, doughy goodness afterwards. Joe said that, if eaten fresh out of the oven, this may be his new favorite meal. And all the guests at my show on Friday went nuts for it! So don't be intimidated by the braiding - if I can do it, YOU can do it!

(The braid in the picture is a little different than the one in the recipe. Since I made this one at home for Joe, I used Chipotle mayo instead of regular and subbed chopped bacon for the broccoli. So feel free to be creative with your fillings as well!)


Chicken & Broccoli Braid

1 cup (250 mL) chopped broccoli florets
2 cups (500 mL) chopped cooked chicken breasts
1/2 cup (125 mL) diced red bell pepper
1 cup (250 mL) shredded sharp cheddar cheese
1/2 cup (125 mL) mayonnaise
1 garlic clove, pressed
2 tsp (10 mL) dill
1 garlic clove, pressed
1/4 tsp (1 mL) salt
2 pkg (8 oz or 235 g) refrigerated crescent dough (the new Recipe Creations seamless dough would be even better!)
1 egg white, lightly beaten
2 tbsp (30 mL) slivered almonds

Preheat oven to 375°F (190°C). Combine broccoli, chicken, bell pepper, cheese, mayonnaise, dill mix, pressed garlic and salt in Classic Batter Bowl; mix well.

Unroll one package of the crescent dough; do not separate. Arrange longest sides of dough across width of Rectangle Stone. Repeat with remaining package of dough. Using Baker's Roller®, roll dough to seal perforations. On longest sides of baking stone, cut dough into strips 1 1/2 in. (4 cm) apart, 3 in. (7.5 cm) deep. (There will be 6 in./15 cm in the center for the filling.)

Spread filling evenly over center of dough. To braid, lift dough strips across filling to meet in center, twisting each strip one turn. Continue alternating strips to form a braid. Tuck ends up to seal at end of braid. Brush egg white over dough. Sprinkle with almonds. Bake 25-28 minutes or until deep golden brown

Friday, February 25, 2011

Free Form Burgers

The original name for this recipe is Loose Meat Sandwiches. But when I was discussing this with my friends, none of them were able to get past the "loose meat" moniker - they thought it sounded gross. And since this recipe is totally NOT gross, I changed the name to avoid any further turn-offs. Because you really DO want to make these sandwiches - they are incredibly easy and incredibly delicious. The recipe comes from one of my favorite blogs, A Year of Slow Cooking. What really caught my eye about this recipe is the fact that you don't have to brown the meat before you put it in the crockpot. I've never come across a recipe that didn't require browning the meat, so I was intrigued. I hate the extra step of browning meat before putting it in the crockpot - I feel like if I have to cook it first, the whole point of using the crockpot is defeated.

So this recipe won points with me right off the bat, but it totally won me over once I tasted it. The meat is savory and full of flavor - you definitely can't tell it wasn't browned first. I served these sandwiches on toasted rolls topped with a drizzle of ketchup and mustard and a slice of pickle. Trust me and don't skip the pickle - it really made the sandwiches for me and Joe! And feel free to call it whatever you want ;)

Free Form Burgers

1 pound extra lean ground beef or turkey, thawed (make sure it's lean)
1 onion, finely diced
1 teaspoon kosher salt
1 tablespoon garlic powder
1 tablespoon sugar
1 tablespoon prepared mustard
1 tablespoon apple cider vinegar
2 cups beef broth
8 hamburger buns
burger fixings of your choice

Crumble in the ground meat into slow cooker. Add onion, sugar, spices, mustard, and vinegar. Pour in the beef broth. Mix well until everything is fully incorporated. Cook on low for 8 to 10 hours. Stir well before serving by scooping with a slotted spoons onto hamburger buns. Top with your desired fixings.

Tuesday, February 8, 2011

Two (er, Three) Ingredient Pumpkin Cookies

The official pumpkin season may have passed, but I still have several cans in my pantry and am always in the mood for something pumpkiny. This past weekend I realized that my pantry also contained a spice cake mix that was about to expire so I figured that I would try to marry these two ingredients in some way. I knew that that it was possible to make a cake with just mix and a can of pumpkin, so I went looking in that direction on All Recipes and found these cookies instead.

Random side note: I get a lot of recipes from All Recipes and I always read the reviews before I make the recipe, but the reviews really tend to get on my nerves. People seem to make the recipes with all kinds of modifications and then complain how the recipe is terrible. This one is a perfect example - there are tons of reviews where people added eggs, oil, etc and then gave the recipe one star because the cookies didn't turn out right. They didn't turn out right because you made them wrong!!! (Okay, vent over.)

Anyhow, these cookies require just two ingredients - a spice cake mix and a 15 oz can of pumpkin. I added in chocolate chips because I love the combination of pumpkin and chocolate. I thought these cookies were great! They tasted almost identical to these Pumpkin Chocolate Chip cookies I make, but were much quicker and easier. They're rich and cakey and perfectly sweet. I served these cookies to my former boss and her husband when they came over to visit on Sunday afternoon and they were gobbled up.

Pumpkin Spice Cookies

1 (18.25 ounce) package spice cake mix
1 (15 ounce) can solid pack pumpkin

Preheat oven to 350 degrees F (175 degrees C). Grease cookie sheets.
In a large bowl, stir together the cake mix and pumpkin until well blended. Drop by rounded spoonfuls onto the prepared cookie sheet.
Bake for 18 to 20 minutes in the preheated oven. Allow cookies to cool on baking sheet for 5 minutes before removing to a wire rack to cool completely.

Friday, February 4, 2011

Cranberry Applesauce Muffins

On Monday I had a meeting at my house regarding our local March of Dimes March for Babies walk. Being the mother of micro-preemies, it's needless to say that March of Dimes is an organization close to my heart. The meeting was at 11:00, so I wanted to provide something to munch on but thought it might be a little early for cookies or brownies. I scoured the Internet for a muffin recipe that used ingredients I already had on hand and decided on this recipe for Cranberry Applesauce Muffins. I thought they would be appealing to the adults but also something my kids would enjoy for a snack.

Like most muffins, these were simple to put together. The applesauce I had was sweetened, so I cut back the sugar to 1/4 cup to compensate for that. I also used dried cranberries instead of fresh and sprinkled a little cinnamon sugar on the muffin tops before baking.

I thought these were delicious. Light and sweet, but not too sweet, with a perfect tang from the cranberries. I'll definitely be keeping this in my recipe file.

Cranberry Applesauce Muffins

1 cup unsweetened applesauce
1/3 cup vegetable oil
1 eggs, beaten
2 cups all-purpose flour
1/2 cup white sugar
1 teaspoon baking soda
1 teaspoon ground cinnamon
1/2 teaspoon salt
1 cup fresh or frozen cranberries, chopped
1/2 cup pecans, chopped

Preheat oven to 350 degrees F (175 degrees C). Grease and flour a muffin pan, or use paper liners.
In a small bowl, mix together applesauce, oil and egg. In a large bowl, combine flour, sugar, baking soda, cinnamon and salt. Make a well in the center, and pour in egg mixture. Stir until just moistened. Fold in cranberries and pecans. Spoon into muffin cups, 2/3 full.
Bake in the preheated oven for 25 to 30 minutes, or until a toothpick inserted into the center comes out clean. Cool in pan for 2 minutes before removing.

Saturday, January 29, 2011

Chocolate-Peanut Butter Crunch Bars

As I think I've mentioned before, when I became a stay-at-home mom last year I also became a Pampered Chef consultant. I needed a way to make some extra money without having to be outside the house too much, and Pampered Chef fit the bill. It's a super fun job to have - I get out, I meet new people, and I get to try awesome new recipes like this one.

I'm doing a show this weekend with a Valentine's Day theme, so I'm making a dessert and a wine-based drink. The host and I chose this recipe together, but I'd never actually made it so I figured it would be good to give it a whirl before the show. And I am SO glad I did. Wow - these are good!

They are sort of like a kicked-up rice krispie treat. The bottom layer is your standard rice krispie treat, but with pretzels mixed in for crunch and salt. Then it's topped with a peanut butter layer, and finally a coating of chocolate ganace garnished with peanuts and pretzels. The salty/sweet/chewy/crunchy combos are out of this world. I ate way more of these than I care to admit. Plus, they are quick and easy - no baking required. Any Valentine would be more than happy to receive these treats!

Chocolate-Peanut Butter Crunch Bars
Recipe from: The Pampered Chef

1/4 cup (50 mL) dry-roasted peanuts
3 cups (750 mL) mini pretzel twists (about 1 2/3 cups/400 mL coarsely crushed), divided
3 cups (750 mL) crisp rice cereal
3/4 cup (175 mL) butter (1½ sticks), divided
1 bag (10.5 oz or 250 g) miniature marshmallows
1/2 cup (125 mL) light corn syrup, divided
1 bag (10 oz or 300 g) peanut butter morsels
1 cup (250 mL) semi-sweet chocolate morsels

Coarsely chop peanuts using Food Chopper; set aside. Place pretzels into large resealable plastic bag; coarsely crush using flat side of Meat Tenderizer. Set aside 1/3 cup (75 mL) of the pretzels. Place remaining pretzels and cereal in Stainless (4-qt./4-L) Mixing Bowl.

Place 6 tbsp (90 mL) of the butter in Classic Batter Bowl. Microwave on HIGH 60-90 seconds or until melted. Add marshmallows; microwave on HIGH 60-90 seconds. Stir until marshmallows are completely melted using Mix ‘N Scraper® (see Cook's Tip). Immediately add marshmallow mixture to mixing bowl; mix thoroughly. Spread crust evenly over Medium Sheet Pan; firmly press into pan using Baker's Roller®.

Combine 2 tbsp (30 mL) of the butter and half of the corn syrup in Small Micro-Cooker®. Microwave, uncovered, on HIGH 60-90 seconds or until melted, stirring every 30 seconds. Stir in peanut butter morsels; mix until melted (mixture will be stiff). Spread peanut butter mixture over crust using Small Spreader.

For ganache, place remaining butter and corn syrup in Small Batter Bowl. Microwave on HIGH 60-90 seconds or until melted. Stir in chocolate morsels; mix until smooth. Spread ganache evenly over peanut butter mixture. Sprinkle with peanuts and reserved pretzels. Place in freezer 5-10 minutes or until ganache is set. Cut into 24 squares; cut squares in half.

Yield: 24 servings

Wednesday, January 26, 2011

Oriental Beef and Noodles

This super easy recipe is courtesy of my good friend Colleen. When it comes to making dinner, there's nothing I love more than tossing a few things into the crockpot and leaving it at that. This recipe requires so little work that you can throw it together in even the tightest time crunch. I made a few minor changes to the recipe. I'd heard talk that the veggies tend to disintegrate in the crockpot, so I held off and added mine around lunchtime to see if that helped. And it did - somewhat. My carrots and water chestnuts held their shape, but I still lost my broccoli! I also could not find plain ramen noodles so I used Chinese rice noodles and they were fine.

This dinner smelled amazing as it cooked and tasted just as good - like an authentic stir fry. Joe and I both really enjoyed it.

Oriental Beef and Noodles

1 (16 ounce) package frozen stir fry vegetables
2 - 2 1/2 pounds beef stew meat, cut into 1" cubes
1 (12 ounce) bottle stir-fry sauce, any flavor
1/2 cup water
1/4 teaspoon crushed red pepper
2 (3 ounce) packages ramen noodles, broken
1/4 cup green onions, chopped (I omitted)

Coat a 4 quart slow cooker with cooking spray. Place frozen vegetables in the bottom and top with stew meat. In a medium bowl, stir together stir-fry sauce, water, and red pepper. Pour over stew meat and vegetables in cooker.

Cover and cook on low for 9-10 hours or on high for 4 1/2-5 hours (I recommend low, it will help to break the meat down more).

At the end of cooking time, discard spice packets from ramen noodles. Stir noodles and green onions into meat mixture. Cover and let stand 10 minutes more. Stir before serving. This can be kept on warm for 1-2 hours.

Monday, January 24, 2011

Still here!


And I miss my cooking blog! Sadly, I really haven't been making anything blog worthy recently. Joe requested that I get more back-to-basics with my dinners - in other words, stop trying so many new things and make more of the old recipes we know we like. And I guess he's right - so often I make something that we both love, but in my desire to keep trying new things I never make the favorites again. I have made a few new things here and there, but in the crazy pre-dinner rush to feed Charlie, Lily, Joe and I before the pre-bedtime meltdown, I often forget to take pictures anyway. So there's been a few new, un-blogged meals and a lot of repeats going on here, plus a lot of quick and easy meals that I can throw together at nap time or when Joe gets home from work. And meals like that often turn out great - like this pizza! I took a store-bought pizza crust and topped it with pre-made shredded barbecue chicken (Lloyd's), caramelized onions and cheddar cheese - it was awesome!

But I do have some new recipes planned for this week, so I hope to get them posted and maybe resurrect my little cooking blog. Here's hoping!

Sunday, November 7, 2010

Pumpkin Bread Pudding

A little over a year ago, after being born 15 weeks premature and spending almost 100 days in the NICU, my son and daughter finally came home. I was scheduled to return work part-time about 2 months after we brought them home, but about 2 weeks before my return to work date I was laid off during a corporate restructuring. Since I was very, very unhappy with the thought of leaving Charlie and Lily in someone else's care, I wasn't too upset about suddenly being unemployed and taking on the permanent role of stay-at-home mom. However, suddenly going from two incomes to one is hard to adjust to, so I became a Pampered Chef consultant in order to earn some extra money. I really love selling Pampered Chef! I've met some great people, I have fun doing cooking shows, and I get to try lots and lots of great new recipes.

This recipe for pumpkin bread pudding was one a I did at a show last month. I always try out new recipes in my own kitchen before demonstrating them at a show, so I whipped up this pudding during the babies' nap time one afternoon. This is fantastic! So comforting - totally perfect for a chilly fall evening. Plus, it's incredibly easy and quick to make. It was a hit at my cooking show and is sure to go over well anywhere you choose to serve it!

Pumpkin Bread Pudding

1 loaf (16 ounces) raisin bread
1 can (12 ounces) evaporated milk
1 can(15 ounces) solid pack pumpkin
1/2 cup plus 3 tablespoons sugar, divided
3 eggs
1 1/2 tablespoons pumpkin pie spice
1 tablespoon orange zest
1/4 cup pecans, chopped
Vanilla frozen yogurt or thawed, frozen fat-free whipped topping (optional)

Preheat oven to 400°F. Lightly spray Oval Baker with nonstick cooking spray. Slice bread into 1-inch cubes; set aside.

Pour evaporated milk into small microwave-safe bowl; microwave on HIGH 3 minutes or until hot. In large bowl, whisk pumpkin, 1/2 cup of the sugar, eggs, spice blend and orange zest until smooth. Gradually whisk hot milk into pumpkin mixture.

Place half of the bread cubes over bottom of baker; pour half of the pumpkin mixture over bread. Top with remaining bread cubes and remaining pumpkin mixture. Sprinkle pecans evenly over bread. Sprinkle with remaining sugar. Bake 25-30 minutes or until set. Let stand 15 minutes before serving. Serve with frozen yogurt or whipped topping, if desired.

Yield: 8 servings

Chocolate Pumpkin Loaf

One of my top favorite treats is most definitely pumpkin chocolate chip bread. It is just so, so delicious. A few weeks ago I got a craving and decided to make a few loaves, however I was out of the yogurt I needed to make my favorite chocolate chip pumpkin bread recipe. Then I remembered this recipe for Chocolate & Butterscotch Pumpkin Loaf I found on Jessica's blog and decided to give it a try. The recipe originally comes from the Baked - New Frontiers in Baking cookbook. I've been seeing recipes from the book popping up in many other food blogs, so I was eager to see what all the fuss was about.

I modified the recipe a little since I didn't have any butterscotch chips in the house. Instead, I just replaced them with more chocolate chips. The recipe calls for dark chocolate chips, but I only had semi-sweet, plus I'm not really a dark chocolate fan. I was a bit skeptical of the addition of water, since I've never baked a quick bread that required water. I was tempted to leave it out, but am glad I didn't because the bread baked up perfectly the way it was. And how was it? Pretty darn delicious! This recipe is thisclose to being as good as my favorite, although it's a lot more heavy on calories and fat than my other. But it was GOOD. My brother-in-law happened to stop by after I finished baking the loaves, so I sent one home with him to enjoy with his girlfriend Bec. He texted me around dinner time to let me know that he'd already finished 1/3 loaf himself. As for the other loaf, I happily polished that one off myself in less than 3 days. I'd like to say that I shared it with Joe, Charlie and Lily, but that would be a lie.

Chocolate & Butterscotch Pumpkin Loaf

Yields: 2 loaves

3-1/4 c all-purpose flour
2 tsp cinnamon
1/2 tsp freshly-grated nutmeg
1/2 tsp ground allspice
1/2 tsp ground ginger
2 tsp baking soda
2 tsp Kosher salt
1 (15 oz.) can pumpkin puree
1 c vegetable oil
3 c sugar
4 large eggs
1 tsp pure vanilla extract
2/3 c room-temperature water
1 c dark chocolate chips (I used 1 1/2 cups of semi-sweet chocolate chips)
1/2 c butterscotch chips (I ommitted)

Preheat the oven to 350 degrees F. Butter two 9″x5″x3″ loaf pans, dust them with flour and knock out the excess flour.

In a large bowl, whisk together the flour, cinnamon, nutmeg, allspice, ginger, baking soda and salt. In another large bowl, whisk together the pumpkin puree and oil until combined. Add the sugar and whisk again. Whisk the eggs into the mixture, one at a time, followed by the vanilla. Add the water and whisk until combined. With a rubber spatula, stir in the butterscotch and chocolate chips.

Fold the dry ingredients into the wet, but do not overmix. Evenly divide the batter between the prepared pans. Gently knock the bottom of the pans against the countertop to even out the batter. Use the spatula to smooth the tops.

Bake in the center of the oven until a toothpick inserted into the center of a loaf comes out clean, about 1 hour and 15 minutes to 1 hour and 30 minutes, rotating the pans halfway through baking time. Transfer the pans to a wire rack and cool for 15 minutes. Invert the loaves onto wire racks and cool completely before serving. The loaves will keep for 3 days, wrapped in plastic wrap, at room temperature.

Tuesday, October 19, 2010

Candy Bar Shortbread Cookies

Halloween is almost here, and we all know what that means - tons of leftover candy to deal with once the trick-or-treaters have all gone home. You could sit down in front of Glee and eat yourself sick (which is what I probably would have done myself), or you could put the candy to a better use and make these cookies to share (or eat all by yourself in front of Glee).
These cookies (from Martha Stewart's Everyday Food) come together very quickly and are addictive. You can definitely taste those 2 sticks of butter in the crust - it's rich and crumbly and delicious. I used Butterfingers for these bars, but I'm eager to experiment with other kinds.
Candy Bar Shortbread Cookies

2 sticks salted butter, softened
3/4 cup light brown sugar
2 cups AP flour
1 cup chocolate chips
12 oz favorite candy bars, chopped

Preheat oven to 350. Prepare an 8 inch baking pan. Cream butter and light brown sugar and salt about 3 mins. Once creamed, add in flour in 3 additions, blending well in between each addition. (It will be a bit crumbly).
Add to prepared pan and bake for 30-35 mins (until golden brown and firm). Add chocolate chips on top and place back into oven for a minute more. Take out of oven and with an offset spatula, smooth out the melted chocolate chips. Add candy bar pieces and let cool on wire rack for 30 mins. Then pop into fridge to firm up for a couple minutes before cutting.

Saturday, October 16, 2010

Taco Bake

This recipe has been circulating among my friends for quite some time now, and I'm pretty sure that Colleen started it all. If I remember correctly, she made it for Lauren's family after the birth of Lauren's newest son. Lauren and her husband raved about it, then Lauren made it and posted it on her blog. (I believe the recipe actually originated on Taste and Tell.)

I've had this recipe saved since that time, and since Lauren's son is now 15 months old, I figured it was about time that I got around to trying it for myself. And I'm glad I did - this is delicious! I never would have thought of using buttermilk biscuits in a Mexican recipe, but they act almost like tortillas with a little more heft. I actually ate the leftovers of this for lunch the next day, and I hardly ever eat leftovers. But this was too good to let go to waste!

Taco Bake

16 oz. taco sauce
12 ounce can buttermilk biscuits
4-6 ounces shredded cheddar cheese
4-6 ounces shredded mozzarella cheese
1 can sliced olives, drained
1 pound ground beef
1 teaspoon chili powder
1 teaspoon cumin
1/4 cup red bell pepper, chopped
1/4 cup green bell pepper, chopped
8 ounces mushrooms, sliced

Preheat oven to 400F. Lightly grease a 13x9 inch baking dish. Spread taco sauce evenly over bottom of dish.

Separate dough into 10 biscuits. Cut each biscuit into 4 pieces. Place biscuit pieces in hot sauce, turn to coat. Sprinkle biscuits with half of the cheese and the olives. Bake for 15-18 minutes.

In a large skillet, combine ground beef, peppers, mushrooms, cumin and chili powder. Cook until ground beef is cooked through.

Sprinkle the ground beef mixture over the baked biscuit mixture. Top with the remaining cheese. Bake an additional 5-7 minutes, until cheese is melted.


Tuesday, October 12, 2010

Soft Pumpkin Yeast Bread

Several weeks ago Joe and I were in the checkout line of BJ's when I spotted the Taste of Home Fall Baking Cookbook on the magazine rack. I snatched it up and tossed it on the conveyor belt, and Joe nearly choked when it rang up at $9.99. I say it's been worth it though, as I've already made several recipes from the book and there's still plenty of Fall left!

This recipe incorporates two things I adore - pumpkin and my bread maker. It smelled incredible while baking and yielded a soft loaf that was just slightly sweet with hints of spice. It was awesome warm with some melted butter, and even my toddlers gobbled it up. I didn't have any walnuts, so I omitted them from the recipe, and it turned out just fine. This bread would be perfect on a cool, crisp evening served alongside a pork roast or some turkey.

Soft Pumpkin Yeast Bread

1/2 cup canned pumpkin
1 cup warm evaporated milk (70-80 degrees)
2 tablespoons butter, softened
2 tablespoons brown sugar
1/2 teaspoon salt
3 cups bread flour
2-3 teaspoons pumpkin pie spice
1/2 cup ground walnuts (I omitted)
2 1/4 teaspoons active dry yeast

In a bread machine pan, place all ingredients in order suggested by manufacturer. Select basic bread setting. Choose crust color and loaf size if available.

Bake according to bread machine directions.

Cheeseburger Pasta

It's Velveeta, versus cheddar! Our Velveeta, melts much better. Cheddar's lumpy, cheddar's oily. It runs off of your plate onto to your doily!

Does anyone but me remember that jingle? It must be, oh, 15 years old by now? But it's always what pops into my head when I hear "Velveeta." I've actually never cooked with Velveeta before. I guess I've just never had cause to. But when I spotted this quick and simple recipe on my good friend Lauren's blog I decided it was time to grab some Velveeta.

Upon spotting the Velveeta on the counter when I was making dinner, Joe got super excited and told me how his dad used to buy it all the time when he was a kid and how much he'd loved it. He asked for a piece to snack on, then promptly declared it to be not nearly as good as he remembered. Isn't that always the way? But being that I had no fond childhood memories involving processed cheese, I found it to be quite tasty. And I loved it in this pasta! This was a lot like hamburger helper, but with more flavor and way less sodium and chemicals. I found myself sneaking bites of the leftovers from the pan as I was cleaning up from dinner, so it was definitely a winner. Kids are sure to love this too!

Cheeseburger Pasta

1 lb ground turkey breast
1 onion, diced
2 3/4 cups water
1/3 cup ketchup
1T mustard
2 cups elbow mac, uncooked
4 oz reduced fat Velveeta, cubed

Brown meat in a large skillet, drain.

Add water, ketchup, onion powder and mix well.

Bring to a boil and add mac. Simmer on med-low heat, covered, for 8-10 minutes (until pasta tender).

Stir in Velveeta and cook until melted, stirring occasionally.

Breakfast Pizza

I love "to do" lists. When I worked in an office I never left for the night before writing out a "to do" list for the next day. Now that I'm a stay-at-home mom, I still write myself "to do" lists to make sure all of my chores and other things actually get done. This morning I added "update food blog" to me list, and since I get great pleasure in crossing things off my list, here I am with some new posts!

I'll start with this breakfast pizza from Amanda's blog. All I can say is, wow. Wow. This pizza was freaking awesome! I loved the way the eggs reached a sort of over-easy texture in the oven, and when I cut into a slice of pizza the yolk oozed all over making a delicious sauce to dip my crust in. Mmmmmm. I used turkey bacon to cut down on the fat, and used more eggs than the original recipe called for because I wanted to make sure that each slice would have some egg. We had this for dinner and enjoyed every bite, but it would also be a really unique addition to a brunch table.

Breakfast Pizza

1 homemade or store-bought pizza dough
6 strips bacon
1 cup grated Parmesan
1 cups grated mozzarella
4 eggs
salt and pepper
2 tablespoons minced chives
olive oil, for brushing

Preheat the oven to 500F or follow package instruction.

Fry bacon strips over medium-high heat until crisp. Cool on a plate lined with paper towels. Crumble. Set aside.

Dust your baking sheet with cornmeal and stretch dough to fit. Sprinkle with Parmesan, mozzarella, and bacon. Crack eggs over top and season and season with salt and pepper. Brush the exposed crust with olive oil.

Bake for 10 – 12 minutes or until eggs are cooked through and crust is golden brown. Sprinkle chives over top.

Sunday, August 29, 2010

Stuffed Pizza Rolls

I never intended to make this recipe. I'm a Pampered Chef consultant, and a few weeks ago my new Fall/Winter Season's Best Cookbook came in the mail. I wanted to try out some of the recipes, and one on my list was for an Italian pot pie. The recipe called for pizza dough, cheese and sausage, so I bought all the ingredients at the store. Only to promptly lose my new cookbook and be unable to find the recipe online. And of course, I didn't discover that I had lost the cookbook until right before I went to make dinner. The sausage was already defrosted and I was in the mood for something pizza-esque, so I hopped online and did a quick search for something else.

These pizza rolls jumped right out at me. They sounded delicious and seemed easy to put together. I decided to make half sausage for Joe, and the other half broccoli for me and the babies. All four of us enjoyed these pizza rolls - they are garlicky and cheesy and perfect for dipping in pizza sauce. This would be a fun meal for a casual get-together or a weekend lunch, and kids would definitely enjoy helping make them. You can do any combination of fillings and come up with something everyone will love.

Stuffed Pizza Rolls

1 roll refrigerated pizza dough
marinara/pizza sauce
2 T grated Parmesan cheese
1 T olive oil or melted butter
1/2 t garlic powder
1 t dried Italian seasoning
mozzarella cheese
Pizza toppings of your choice (sausage, pepperoni, mushrooms, etc.)

Preheat oven to heat specified on pizza dough package.

Unroll your pizza dough onto a lightly floured surface. Pat or roll the dough so it's about 12" by 8". You're going to want to cut it into 24 squares, so just eyeball it if you need to. Slice the dough into 24 squares

Place cheese and desired toppings on each square.

When all of your dough squares have cheese and toppings on them, carefully lift up each square and wrap the dough around the toppings. Pinch to make sure each ball is sealed shut and then place them seam side down in a lightly sprayed pie pan (or similar sized dish).

Brush the tops of the dough balls with olive oil or melted butter and then sprinkle with the garlic and Italian seasoning and top with Parmesan cheese.

Bake 15-20 minutes or until golden brown on top. Serve warm with heated marinara sauce on the side for dipping.

Monday, July 26, 2010

Peanut Butter Crusted Sweet Potato Fries

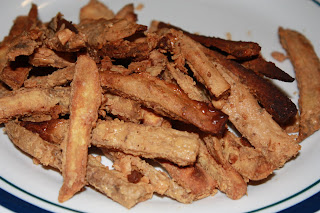
I've mentioned before how much I enjoy Amanda's blog, Fake Ginger. I find her recipes to be unique and appealing, and these sweet potato fries were no exception. Combining two of my favorite foods and calling it dinner? Sweet! I made these on a night when I had promised Joe steak pinwheels. I don't eat steak, and I knew that he wouldn't touch these fries, so I made these for myself. And ate them all. They were so good! I used crunchy natural peanut butter and it complimented the slight sweetness of the potatoes perfectly. These need no condiments at all - they are perfect as they are.

Peanut Butter Crusted Sweet Potato Fries

2 medium sweet potatoes, peeled and cut into thin fry-like strips
3 tablespoons chunky peanut butter
1 tablespoon extra virgin olive oil
1/2 teaspoon fine grain sea salt

Preheat oven to 400F and line a baking sheet with parchment paper.

In a medium size bowl, mix together the peanut butter, olive oil, and salt. Take sweet potatoes and toss in bowl with your hands until fully coated. Line up on baking pan and cook at 400F for 20 minutes. Flip and bake for another 10 – 20 minutes or until crisp.

Snickerdoodle Blondies

Like most people, when I think of snickerdoodles I think of Christmas. Snickerdoodles are one of the cookies I make each holiday season. They're not my favorites - my heart belongs to peanut butter blossoms - but I just feel like they are quintessential to Christmas. So I surprised myself by by rushing right out and making these snickerdoodle blondies. In July. But when I saw them on Michelle's blog I thought they looked so good I couldn't resist. I've been all about the bar cookies recently, and I knew I had all the ingredients in the house. I literally made these about an hour after I came across them in my Google Reader. And I'm glad I did! Not only did these smell awesome while they were baking, but they tasted exactly like my holiday snickerdoodles. Light and slightly tangy with that sweet/spicy topping. Yum! No need to wait until December for snickerdoodles - give these blondies a go to hold you over.

Snickerdoodle Blondies

2-2/3 cups all-purpose flour
2 teaspoons baking powder
1 teaspoon salt
1 teaspoon cinnamon
¼ teaspoon ground nutmeg
2 cups packed brown sugar
1 cup (8 ounces) unsalted butter, at room temperature
2 eggs
1 tablespoon vanilla extract
2 tablespoons granulated sugar
2 teaspoons cinnamon

Preheat the oven to 350 degrees F. Lightly grease a 9×13-inch baking pan; set aside. Whisk together the flour, baking powder, salt, cinnamon and nutmeg in a medium bowl; set aside. Beat together the butter and brown sugar on medium speed until light and fluffy, about 5 minutes. Add the eggs one at a time, and then the vanilla. Beat, scraping the bowl, until thoroughly combined. On low speed, gradually add the flour mixture until just combined. Give the dough a final stir with a spatula or wooden spoon to make sure the flour is incorporated. Spread the dough evenly into the pan (I found an offset spatula was the best tool for the job, as it’s a thick batter). Combine the granulated sugar and cinnamon in a small bowl and sprinkle evenly over the top of the batter. Bake for 25-30 minutes or until the surface springs back when gently pressed. Cool completely before cutting. Store in an airtight container at room temperature.

Sunday, July 18, 2010

Pineapple Coconut Bread

A few weeks ago my friends Colleen and Jenn brought their babies, Abbie and Owen, over for a play date with Charlie and Lily in our spalsh pool. Colleen brought hummus and chips and Jenn made some yummy spinach dip, so I wanted to contribute something sweet. I knew I wanted to make a quick bread of some sort, and I wanted it to have summery flavors. Like pineapple. I LOVE pineapple, and I had a big can of the crushed stuff in my pantry. After a little searching on All Recipes I decided on this one to make. Since it is swimsuit season after all, I chose to lighten it up a bit. I kept the butter, but used Egg Beaters in place of the egg and Splenda instead of sugar. I also substituted coconut for the walnuts to make it even more tropical-tasting.

This bread was delicious! It was tender and crumbly and just sweet enough. It was awesome warm with a bit of butter. I will definitely be making this again!

Pineapple Coconut Bread

2 eggs (I used Egg Beaters)
1/2 cup melted butter
1 cup white sugar or Splenda Baking
1 cup crushed pineapple with juice
1 teaspoon vanilla extract
2 1/2 cups all-purpose flour
3 teaspoons baking powder
1/2 teaspoon baking soda
3/4 teaspoon salt
1/2 cup shredded sweetened coconut

Preheat oven to 350 degrees F (175 degrees C). Grease one 9x5x3 inch loaf pan.
Beat eggs slightly. Add butter and sugar. Beat smooth. Stir in pineapple and vanilla.
In separate bowl put flour, baking powder, soda, salt, and walnuts. Stir well and pour into pineapple mixture. Stir to moisten. Pour into greased 9x5x3 inch loaf pan.
Bake in 350 degree F (175 degree C) oven for 1 hour. Test with toothpick. Let stand 10 minutes. Remove from pan. Cool and wrap.

Pool party!

Wednesday, June 9, 2010

Sugar Cookie Bars

I've recently become a big fan of bar cookies. There's really no food I enjoy more than a good cookie, but I find that I rarely have the patience for pulling out the cookie sheets, scooping out the dough, cooling the cookies on racks, etc. But with a bar cookie, the steps are simple - mix the dough, press it into a pan, bake. Viola - cookies!

Sugar cookies are not typically my cookie of choice, but I had been looking into getting some decorated sugar cookies for Charlie and Lily's upcoming birthday party so they were on my mind. Then the other night I came across this recipe for Sugar Cookie Bars on Annie's blog and couldn't resist whipping them up.

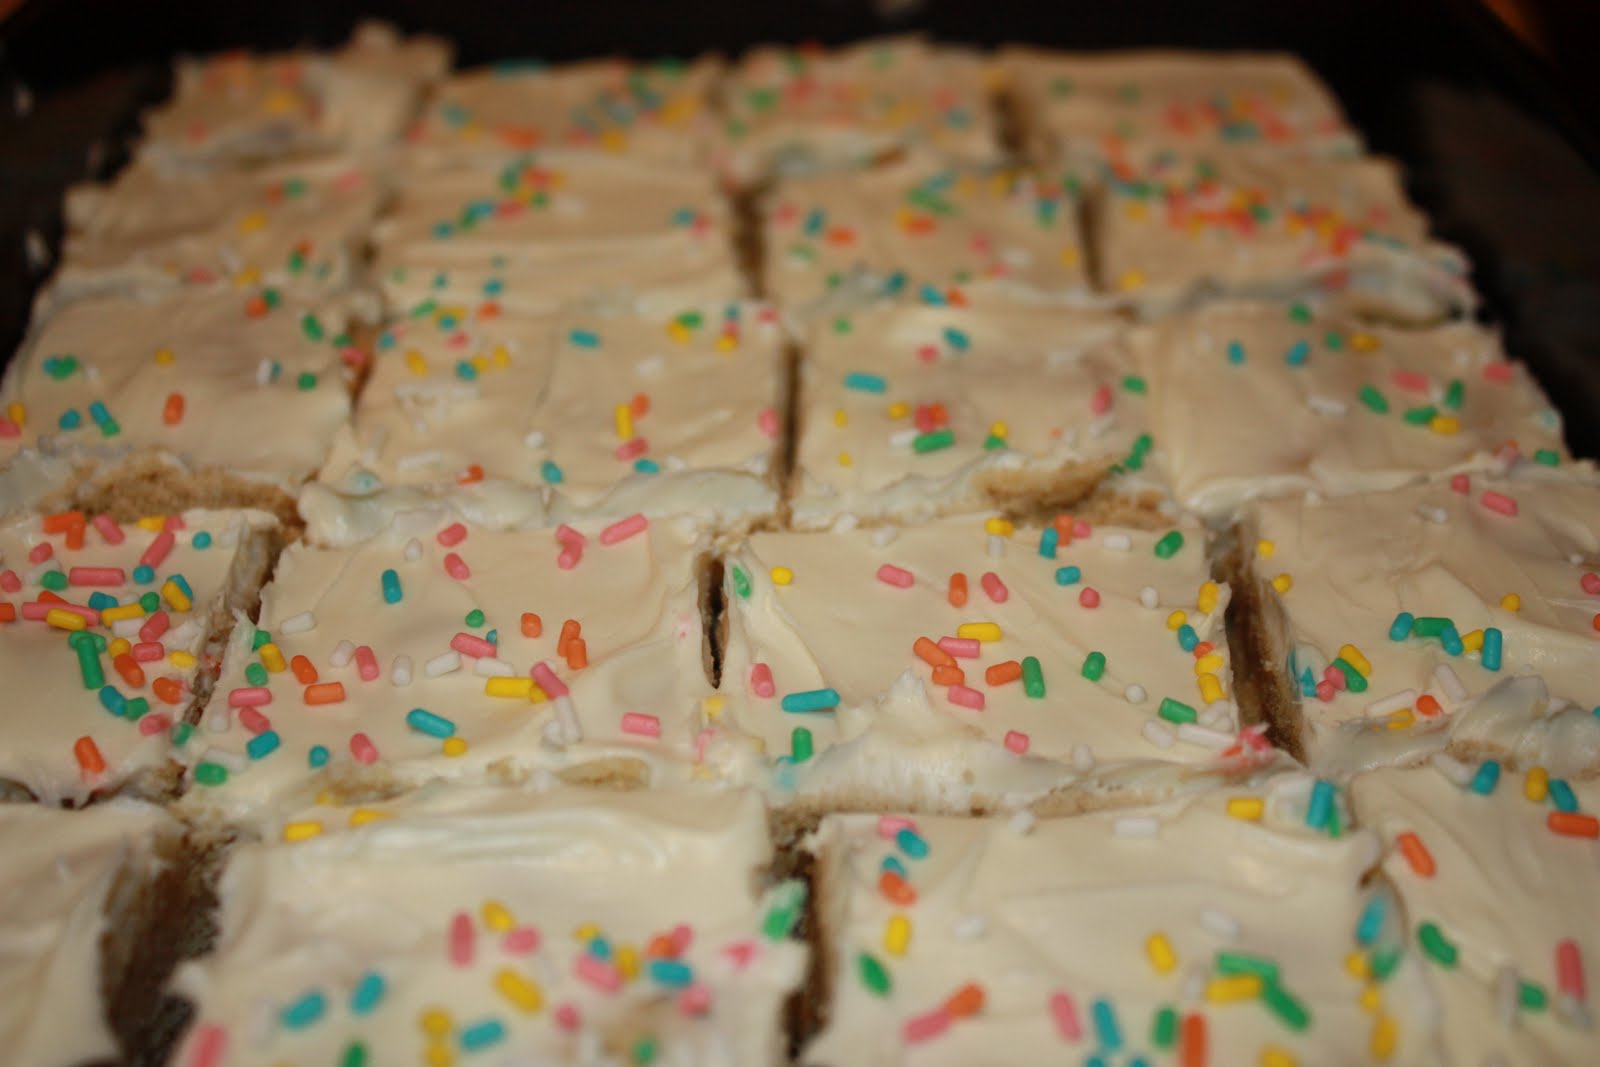
First, let me say that this recipe makes a LOT of bars. I think I got almost 40 good-sized bars, so this recipe would be perfect for a summer barbecue or party. The bars came out tender and just slightly sweet. Annie suggested using vanilla bean and lemon zest in addition to the vanilla extract. I did not, since I had neither on hand (and I hate lemon) and I thought they were very good as they were - just like a normal sugar cookie. Instead of using the buttercream frosting that went along with this cookie recipe (I didn't have any powdered sugar), I cheated and used a can of Funfetti frosting from my pantry. The bars taste great this way, but I would like to try the frosting recipe next time, especially since I love buttercream. (And I'm including the buttercream recipe below in case you'd like to make it!)

These bars are tasty, simple and fun! I may become a sugar cookie convert after all.

Sugar Cookie Bars

For the cookie bars:
1 cup (2 sticks) unsalted butter, at room temperature
2 cups sugar
4 large eggs
2 tsp. vanilla extract
5 cups all-purpose flour
1 tsp. salt
½ tsp. baking soda

For the frosting:
1 cup (2 sticks) unsalted butter, at room temperature
1 tsp. vanilla extract
Pinch of salt
4 cups confectioners’ sugar, sifted
5 tbsp. milk
Food coloring (optional)

To make the cookies, preheat the oven to 350˚ F. Grease a 13 x 18″ rimmed baking sheet. Combine the butter and sugar in the bowl of an electric mixer. Beat on medium-high speed until light and smooth, about 2 minutes. Mix in the eggs one at a time, beating well after each addition and scraping down the sides of the bowl as needed. Blend in the vanilla. In a medium bowl, combine the flour, salt and baking soda. Stir together with a fork to blend. Add the dry ingredients to the mixer bowl and beat on low speed just until incorporated.

Transfer the cookie dough to the prepared baking sheet and press into an even layer. Bake 10-15 minutes, until light golden brown and a toothpick inserted in the center comes out clean. Transfer the pan to a wire rack and let cool completely before frosting.

To make the frosting, place the butter in the bowl of an electric mixer. Beat on medium-high speed until smooth, about 1 minute. Blend in the vanilla, salt, and confectioners’ sugar until smooth, 1-2 minutes. Mix in the milk. Tint as desired with food coloring. Spread over the cookie in the pan, cut into bars and serve.

Crockpot Roasted Chicken

It's no secret that I adore my crockpot, so I was incredibly excited when I found this recipe for roasted chicken in the crockpot on my brilliant friend Lauren's blog. We love roast chicken, but I've never actually made one myself. For some reason cooking a whole bird in the oven for hours is intimidating to me, but this recipe sounded so easy there was no way I could resist. This is just a fantastic idea! It takes all of two minutes to prepare, and it smells amazing as it cooks. The result is a juicy, tender chicken with meat that just falls off the bone. We ate some of the chicken with mashed potatoes, veggies and rolls, then I used the leftovers in a pasta dish later in the week. You will definitely get more than one meal out of this! Feel free to get creative with the seasonings - I used a lemon pepper seasoning that was great, but I'd also like to try a more garlicky seasoning, or maybe a barbecue rub.

Crockpot Roasted Chicken

Whole chicken (4-5 pounds)
1/2 cup chicken broth
4 cloves garlic, peeled
Olive oil
Seasonings of choice

Prep the chicken- remove the bag from the inside, thoroughly washing out the cavity and outside of the chicken. Pat dry.

Roll 3 pieces of tin foil into balls, about 2 inches in diameter. Place them in a triangle shape on the bottom of the crockpot.

Pour the chicken broth into the bottom of the crockpot. Toss the garlic cloves, whole, into the broth.

Place the chicken on top of the tin foil. Rub a small amount of olive oil over the skin (about 1-2 teaspoons).

Season heavily with the seasonings of your choice, gently rubbing them into the skin.

Cook on low 8 hours.