Sunday, November 7, 2010

Pumpkin Bread Pudding

A little over a year ago, after being born 15 weeks premature and spending almost 100 days in the NICU, my son and daughter finally came home. I was scheduled to return work part-time about 2 months after we brought them home, but about 2 weeks before my return to work date I was laid off during a corporate restructuring. Since I was very, very unhappy with the thought of leaving Charlie and Lily in someone else's care, I wasn't too upset about suddenly being unemployed and taking on the permanent role of stay-at-home mom. However, suddenly going from two incomes to one is hard to adjust to, so I became a Pampered Chef consultant in order to earn some extra money. I really love selling Pampered Chef! I've met some great people, I have fun doing cooking shows, and I get to try lots and lots of great new recipes.

This recipe for pumpkin bread pudding was one a I did at a show last month. I always try out new recipes in my own kitchen before demonstrating them at a show, so I whipped up this pudding during the babies' nap time one afternoon. This is fantastic! So comforting - totally perfect for a chilly fall evening. Plus, it's incredibly easy and quick to make. It was a hit at my cooking show and is sure to go over well anywhere you choose to serve it!

Pumpkin Bread Pudding

1 loaf (16 ounces) raisin bread
1 can (12 ounces) evaporated milk
1 can(15 ounces) solid pack pumpkin
1/2 cup plus 3 tablespoons sugar, divided
3 eggs
1 1/2 tablespoons pumpkin pie spice
1 tablespoon orange zest
1/4 cup pecans, chopped
Vanilla frozen yogurt or thawed, frozen fat-free whipped topping (optional)

Preheat oven to 400°F. Lightly spray Oval Baker with nonstick cooking spray. Slice bread into 1-inch cubes; set aside.

Pour evaporated milk into small microwave-safe bowl; microwave on HIGH 3 minutes or until hot. In large bowl, whisk pumpkin, 1/2 cup of the sugar, eggs, spice blend and orange zest until smooth. Gradually whisk hot milk into pumpkin mixture.

Place half of the bread cubes over bottom of baker; pour half of the pumpkin mixture over bread. Top with remaining bread cubes and remaining pumpkin mixture. Sprinkle pecans evenly over bread. Sprinkle with remaining sugar. Bake 25-30 minutes or until set. Let stand 15 minutes before serving. Serve with frozen yogurt or whipped topping, if desired.

Yield: 8 servings

Chocolate Pumpkin Loaf

One of my top favorite treats is most definitely pumpkin chocolate chip bread. It is just so, so delicious. A few weeks ago I got a craving and decided to make a few loaves, however I was out of the yogurt I needed to make my favorite chocolate chip pumpkin bread recipe. Then I remembered this recipe for Chocolate & Butterscotch Pumpkin Loaf I found on Jessica's blog and decided to give it a try. The recipe originally comes from the Baked - New Frontiers in Baking cookbook. I've been seeing recipes from the book popping up in many other food blogs, so I was eager to see what all the fuss was about.

I modified the recipe a little since I didn't have any butterscotch chips in the house. Instead, I just replaced them with more chocolate chips. The recipe calls for dark chocolate chips, but I only had semi-sweet, plus I'm not really a dark chocolate fan. I was a bit skeptical of the addition of water, since I've never baked a quick bread that required water. I was tempted to leave it out, but am glad I didn't because the bread baked up perfectly the way it was. And how was it? Pretty darn delicious! This recipe is thisclose to being as good as my favorite, although it's a lot more heavy on calories and fat than my other. But it was GOOD. My brother-in-law happened to stop by after I finished baking the loaves, so I sent one home with him to enjoy with his girlfriend Bec. He texted me around dinner time to let me know that he'd already finished 1/3 loaf himself. As for the other loaf, I happily polished that one off myself in less than 3 days. I'd like to say that I shared it with Joe, Charlie and Lily, but that would be a lie.

Chocolate & Butterscotch Pumpkin Loaf

Yields: 2 loaves

3-1/4 c all-purpose flour
2 tsp cinnamon
1/2 tsp freshly-grated nutmeg
1/2 tsp ground allspice
1/2 tsp ground ginger
2 tsp baking soda
2 tsp Kosher salt
1 (15 oz.) can pumpkin puree
1 c vegetable oil
3 c sugar
4 large eggs
1 tsp pure vanilla extract
2/3 c room-temperature water
1 c dark chocolate chips (I used 1 1/2 cups of semi-sweet chocolate chips)
1/2 c butterscotch chips (I ommitted)

Preheat the oven to 350 degrees F. Butter two 9″x5″x3″ loaf pans, dust them with flour and knock out the excess flour.

In a large bowl, whisk together the flour, cinnamon, nutmeg, allspice, ginger, baking soda and salt. In another large bowl, whisk together the pumpkin puree and oil until combined. Add the sugar and whisk again. Whisk the eggs into the mixture, one at a time, followed by the vanilla. Add the water and whisk until combined. With a rubber spatula, stir in the butterscotch and chocolate chips.

Fold the dry ingredients into the wet, but do not overmix. Evenly divide the batter between the prepared pans. Gently knock the bottom of the pans against the countertop to even out the batter. Use the spatula to smooth the tops.

Bake in the center of the oven until a toothpick inserted into the center of a loaf comes out clean, about 1 hour and 15 minutes to 1 hour and 30 minutes, rotating the pans halfway through baking time. Transfer the pans to a wire rack and cool for 15 minutes. Invert the loaves onto wire racks and cool completely before serving. The loaves will keep for 3 days, wrapped in plastic wrap, at room temperature.

Tuesday, October 19, 2010

Candy Bar Shortbread Cookies

Halloween is almost here, and we all know what that means - tons of leftover candy to deal with once the trick-or-treaters have all gone home. You could sit down in front of Glee and eat yourself sick (which is what I probably would have done myself), or you could put the candy to a better use and make these cookies to share (or eat all by yourself in front of Glee).
These cookies (from Martha Stewart's Everyday Food) come together very quickly and are addictive. You can definitely taste those 2 sticks of butter in the crust - it's rich and crumbly and delicious. I used Butterfingers for these bars, but I'm eager to experiment with other kinds.
Candy Bar Shortbread Cookies

2 sticks salted butter, softened
3/4 cup light brown sugar
2 cups AP flour
1 cup chocolate chips
12 oz favorite candy bars, chopped

Preheat oven to 350. Prepare an 8 inch baking pan. Cream butter and light brown sugar and salt about 3 mins. Once creamed, add in flour in 3 additions, blending well in between each addition. (It will be a bit crumbly).
Add to prepared pan and bake for 30-35 mins (until golden brown and firm). Add chocolate chips on top and place back into oven for a minute more. Take out of oven and with an offset spatula, smooth out the melted chocolate chips. Add candy bar pieces and let cool on wire rack for 30 mins. Then pop into fridge to firm up for a couple minutes before cutting.

Saturday, October 16, 2010

Taco Bake

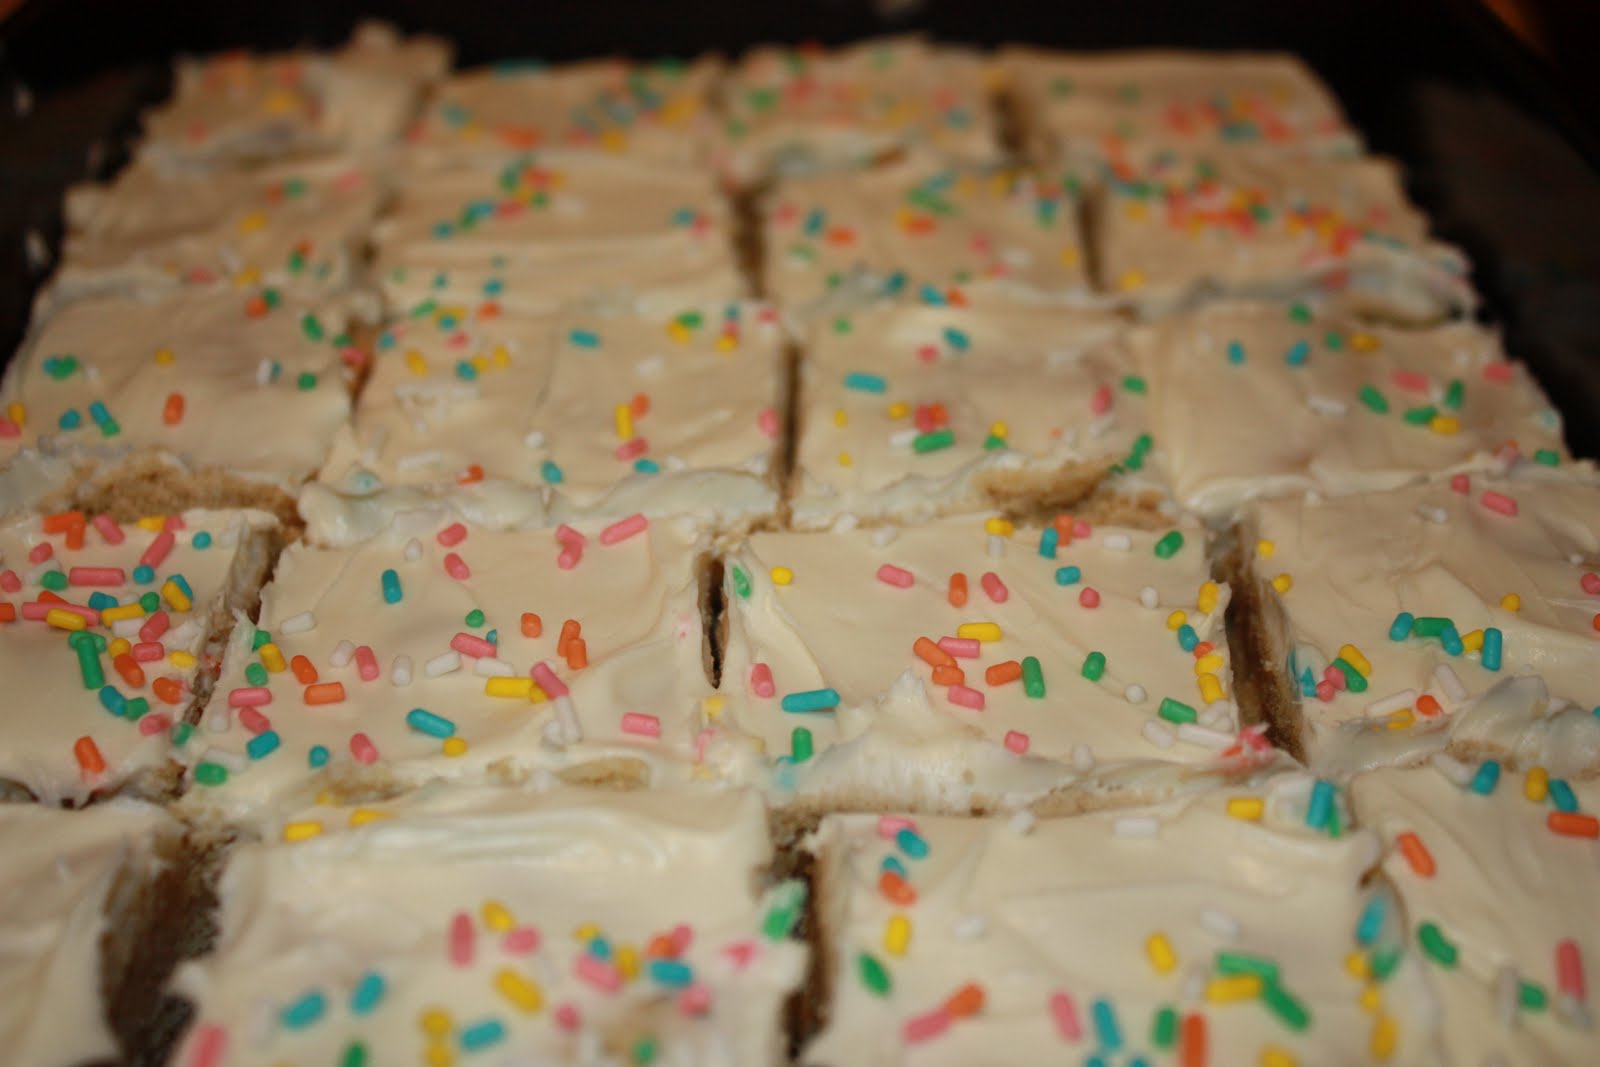
This recipe has been circulating among my friends for quite some time now, and I'm pretty sure that Colleen started it all. If I remember correctly, she made it for Lauren's family after the birth of Lauren's newest son. Lauren and her husband raved about it, then Lauren made it and posted it on her blog. (I believe the recipe actually originated on Taste and Tell.)

I've had this recipe saved since that time, and since Lauren's son is now 15 months old, I figured it was about time that I got around to trying it for myself. And I'm glad I did - this is delicious! I never would have thought of using buttermilk biscuits in a Mexican recipe, but they act almost like tortillas with a little more heft. I actually ate the leftovers of this for lunch the next day, and I hardly ever eat leftovers. But this was too good to let go to waste!

Taco Bake

16 oz. taco sauce
12 ounce can buttermilk biscuits
4-6 ounces shredded cheddar cheese
4-6 ounces shredded mozzarella cheese
1 can sliced olives, drained
1 pound ground beef
1 teaspoon chili powder
1 teaspoon cumin
1/4 cup red bell pepper, chopped
1/4 cup green bell pepper, chopped
8 ounces mushrooms, sliced

Preheat oven to 400F. Lightly grease a 13x9 inch baking dish. Spread taco sauce evenly over bottom of dish.

Separate dough into 10 biscuits. Cut each biscuit into 4 pieces. Place biscuit pieces in hot sauce, turn to coat. Sprinkle biscuits with half of the cheese and the olives. Bake for 15-18 minutes.

In a large skillet, combine ground beef, peppers, mushrooms, cumin and chili powder. Cook until ground beef is cooked through.

Sprinkle the ground beef mixture over the baked biscuit mixture. Top with the remaining cheese. Bake an additional 5-7 minutes, until cheese is melted.


Tuesday, October 12, 2010

Soft Pumpkin Yeast Bread

Several weeks ago Joe and I were in the checkout line of BJ's when I spotted the Taste of Home Fall Baking Cookbook on the magazine rack. I snatched it up and tossed it on the conveyor belt, and Joe nearly choked when it rang up at $9.99. I say it's been worth it though, as I've already made several recipes from the book and there's still plenty of Fall left!

This recipe incorporates two things I adore - pumpkin and my bread maker. It smelled incredible while baking and yielded a soft loaf that was just slightly sweet with hints of spice. It was awesome warm with some melted butter, and even my toddlers gobbled it up. I didn't have any walnuts, so I omitted them from the recipe, and it turned out just fine. This bread would be perfect on a cool, crisp evening served alongside a pork roast or some turkey.

Soft Pumpkin Yeast Bread

1/2 cup canned pumpkin
1 cup warm evaporated milk (70-80 degrees)
2 tablespoons butter, softened
2 tablespoons brown sugar
1/2 teaspoon salt
3 cups bread flour
2-3 teaspoons pumpkin pie spice
1/2 cup ground walnuts (I omitted)
2 1/4 teaspoons active dry yeast

In a bread machine pan, place all ingredients in order suggested by manufacturer. Select basic bread setting. Choose crust color and loaf size if available.

Bake according to bread machine directions.

Cheeseburger Pasta

It's Velveeta, versus cheddar! Our Velveeta, melts much better. Cheddar's lumpy, cheddar's oily. It runs off of your plate onto to your doily!

Does anyone but me remember that jingle? It must be, oh, 15 years old by now? But it's always what pops into my head when I hear "Velveeta." I've actually never cooked with Velveeta before. I guess I've just never had cause to. But when I spotted this quick and simple recipe on my good friend Lauren's blog I decided it was time to grab some Velveeta.

Upon spotting the Velveeta on the counter when I was making dinner, Joe got super excited and told me how his dad used to buy it all the time when he was a kid and how much he'd loved it. He asked for a piece to snack on, then promptly declared it to be not nearly as good as he remembered. Isn't that always the way? But being that I had no fond childhood memories involving processed cheese, I found it to be quite tasty. And I loved it in this pasta! This was a lot like hamburger helper, but with more flavor and way less sodium and chemicals. I found myself sneaking bites of the leftovers from the pan as I was cleaning up from dinner, so it was definitely a winner. Kids are sure to love this too!

Cheeseburger Pasta

1 lb ground turkey breast
1 onion, diced
2 3/4 cups water
1/3 cup ketchup
1T mustard
2 cups elbow mac, uncooked
4 oz reduced fat Velveeta, cubed

Brown meat in a large skillet, drain.

Add water, ketchup, onion powder and mix well.

Bring to a boil and add mac. Simmer on med-low heat, covered, for 8-10 minutes (until pasta tender).

Stir in Velveeta and cook until melted, stirring occasionally.

Breakfast Pizza

I love "to do" lists. When I worked in an office I never left for the night before writing out a "to do" list for the next day. Now that I'm a stay-at-home mom, I still write myself "to do" lists to make sure all of my chores and other things actually get done. This morning I added "update food blog" to me list, and since I get great pleasure in crossing things off my list, here I am with some new posts!

I'll start with this breakfast pizza from Amanda's blog. All I can say is, wow. Wow. This pizza was freaking awesome! I loved the way the eggs reached a sort of over-easy texture in the oven, and when I cut into a slice of pizza the yolk oozed all over making a delicious sauce to dip my crust in. Mmmmmm. I used turkey bacon to cut down on the fat, and used more eggs than the original recipe called for because I wanted to make sure that each slice would have some egg. We had this for dinner and enjoyed every bite, but it would also be a really unique addition to a brunch table.

Breakfast Pizza

1 homemade or store-bought pizza dough
6 strips bacon
1 cup grated Parmesan
1 cups grated mozzarella
4 eggs
salt and pepper
2 tablespoons minced chives
olive oil, for brushing

Preheat the oven to 500F or follow package instruction.

Fry bacon strips over medium-high heat until crisp. Cool on a plate lined with paper towels. Crumble. Set aside.

Dust your baking sheet with cornmeal and stretch dough to fit. Sprinkle with Parmesan, mozzarella, and bacon. Crack eggs over top and season and season with salt and pepper. Brush the exposed crust with olive oil.

Bake for 10 – 12 minutes or until eggs are cooked through and crust is golden brown. Sprinkle chives over top.

Sunday, August 29, 2010

Stuffed Pizza Rolls

I never intended to make this recipe. I'm a Pampered Chef consultant, and a few weeks ago my new Fall/Winter Season's Best Cookbook came in the mail. I wanted to try out some of the recipes, and one on my list was for an Italian pot pie. The recipe called for pizza dough, cheese and sausage, so I bought all the ingredients at the store. Only to promptly lose my new cookbook and be unable to find the recipe online. And of course, I didn't discover that I had lost the cookbook until right before I went to make dinner. The sausage was already defrosted and I was in the mood for something pizza-esque, so I hopped online and did a quick search for something else.

These pizza rolls jumped right out at me. They sounded delicious and seemed easy to put together. I decided to make half sausage for Joe, and the other half broccoli for me and the babies. All four of us enjoyed these pizza rolls - they are garlicky and cheesy and perfect for dipping in pizza sauce. This would be a fun meal for a casual get-together or a weekend lunch, and kids would definitely enjoy helping make them. You can do any combination of fillings and come up with something everyone will love.

Stuffed Pizza Rolls

1 roll refrigerated pizza dough
marinara/pizza sauce
2 T grated Parmesan cheese
1 T olive oil or melted butter
1/2 t garlic powder
1 t dried Italian seasoning
mozzarella cheese
Pizza toppings of your choice (sausage, pepperoni, mushrooms, etc.)

Preheat oven to heat specified on pizza dough package.

Unroll your pizza dough onto a lightly floured surface. Pat or roll the dough so it's about 12" by 8". You're going to want to cut it into 24 squares, so just eyeball it if you need to. Slice the dough into 24 squares

Place cheese and desired toppings on each square.

When all of your dough squares have cheese and toppings on them, carefully lift up each square and wrap the dough around the toppings. Pinch to make sure each ball is sealed shut and then place them seam side down in a lightly sprayed pie pan (or similar sized dish).

Brush the tops of the dough balls with olive oil or melted butter and then sprinkle with the garlic and Italian seasoning and top with Parmesan cheese.

Bake 15-20 minutes or until golden brown on top. Serve warm with heated marinara sauce on the side for dipping.

Monday, July 26, 2010

Peanut Butter Crusted Sweet Potato Fries

I've mentioned before how much I enjoy Amanda's blog, Fake Ginger. I find her recipes to be unique and appealing, and these sweet potato fries were no exception. Combining two of my favorite foods and calling it dinner? Sweet! I made these on a night when I had promised Joe steak pinwheels. I don't eat steak, and I knew that he wouldn't touch these fries, so I made these for myself. And ate them all. They were so good! I used crunchy natural peanut butter and it complimented the slight sweetness of the potatoes perfectly. These need no condiments at all - they are perfect as they are.

Peanut Butter Crusted Sweet Potato Fries

2 medium sweet potatoes, peeled and cut into thin fry-like strips
3 tablespoons chunky peanut butter
1 tablespoon extra virgin olive oil
1/2 teaspoon fine grain sea salt

Preheat oven to 400F and line a baking sheet with parchment paper.

In a medium size bowl, mix together the peanut butter, olive oil, and salt. Take sweet potatoes and toss in bowl with your hands until fully coated. Line up on baking pan and cook at 400F for 20 minutes. Flip and bake for another 10 – 20 minutes or until crisp.

Snickerdoodle Blondies

Like most people, when I think of snickerdoodles I think of Christmas. Snickerdoodles are one of the cookies I make each holiday season. They're not my favorites - my heart belongs to peanut butter blossoms - but I just feel like they are quintessential to Christmas. So I surprised myself by by rushing right out and making these snickerdoodle blondies. In July. But when I saw them on Michelle's blog I thought they looked so good I couldn't resist. I've been all about the bar cookies recently, and I knew I had all the ingredients in the house. I literally made these about an hour after I came across them in my Google Reader. And I'm glad I did! Not only did these smell awesome while they were baking, but they tasted exactly like my holiday snickerdoodles. Light and slightly tangy with that sweet/spicy topping. Yum! No need to wait until December for snickerdoodles - give these blondies a go to hold you over.

Snickerdoodle Blondies

2-2/3 cups all-purpose flour
2 teaspoons baking powder
1 teaspoon salt
1 teaspoon cinnamon
¼ teaspoon ground nutmeg
2 cups packed brown sugar
1 cup (8 ounces) unsalted butter, at room temperature
2 eggs
1 tablespoon vanilla extract
2 tablespoons granulated sugar
2 teaspoons cinnamon

Preheat the oven to 350 degrees F. Lightly grease a 9×13-inch baking pan; set aside. Whisk together the flour, baking powder, salt, cinnamon and nutmeg in a medium bowl; set aside. Beat together the butter and brown sugar on medium speed until light and fluffy, about 5 minutes. Add the eggs one at a time, and then the vanilla. Beat, scraping the bowl, until thoroughly combined. On low speed, gradually add the flour mixture until just combined. Give the dough a final stir with a spatula or wooden spoon to make sure the flour is incorporated. Spread the dough evenly into the pan (I found an offset spatula was the best tool for the job, as it’s a thick batter). Combine the granulated sugar and cinnamon in a small bowl and sprinkle evenly over the top of the batter. Bake for 25-30 minutes or until the surface springs back when gently pressed. Cool completely before cutting. Store in an airtight container at room temperature.

Sunday, July 18, 2010

Pineapple Coconut Bread

A few weeks ago my friends Colleen and Jenn brought their babies, Abbie and Owen, over for a play date with Charlie and Lily in our spalsh pool. Colleen brought hummus and chips and Jenn made some yummy spinach dip, so I wanted to contribute something sweet. I knew I wanted to make a quick bread of some sort, and I wanted it to have summery flavors. Like pineapple. I LOVE pineapple, and I had a big can of the crushed stuff in my pantry. After a little searching on All Recipes I decided on this one to make. Since it is swimsuit season after all, I chose to lighten it up a bit. I kept the butter, but used Egg Beaters in place of the egg and Splenda instead of sugar. I also substituted coconut for the walnuts to make it even more tropical-tasting.

This bread was delicious! It was tender and crumbly and just sweet enough. It was awesome warm with a bit of butter. I will definitely be making this again!

Pineapple Coconut Bread

2 eggs (I used Egg Beaters)
1/2 cup melted butter
1 cup white sugar or Splenda Baking
1 cup crushed pineapple with juice
1 teaspoon vanilla extract
2 1/2 cups all-purpose flour
3 teaspoons baking powder
1/2 teaspoon baking soda
3/4 teaspoon salt
1/2 cup shredded sweetened coconut

Preheat oven to 350 degrees F (175 degrees C). Grease one 9x5x3 inch loaf pan.
Beat eggs slightly. Add butter and sugar. Beat smooth. Stir in pineapple and vanilla.
In separate bowl put flour, baking powder, soda, salt, and walnuts. Stir well and pour into pineapple mixture. Stir to moisten. Pour into greased 9x5x3 inch loaf pan.
Bake in 350 degree F (175 degree C) oven for 1 hour. Test with toothpick. Let stand 10 minutes. Remove from pan. Cool and wrap.

Pool party!

Wednesday, June 9, 2010

Sugar Cookie Bars

I've recently become a big fan of bar cookies. There's really no food I enjoy more than a good cookie, but I find that I rarely have the patience for pulling out the cookie sheets, scooping out the dough, cooling the cookies on racks, etc. But with a bar cookie, the steps are simple - mix the dough, press it into a pan, bake. Viola - cookies!

Sugar cookies are not typically my cookie of choice, but I had been looking into getting some decorated sugar cookies for Charlie and Lily's upcoming birthday party so they were on my mind. Then the other night I came across this recipe for Sugar Cookie Bars on Annie's blog and couldn't resist whipping them up.

First, let me say that this recipe makes a LOT of bars. I think I got almost 40 good-sized bars, so this recipe would be perfect for a summer barbecue or party. The bars came out tender and just slightly sweet. Annie suggested using vanilla bean and lemon zest in addition to the vanilla extract. I did not, since I had neither on hand (and I hate lemon) and I thought they were very good as they were - just like a normal sugar cookie. Instead of using the buttercream frosting that went along with this cookie recipe (I didn't have any powdered sugar), I cheated and used a can of Funfetti frosting from my pantry. The bars taste great this way, but I would like to try the frosting recipe next time, especially since I love buttercream. (And I'm including the buttercream recipe below in case you'd like to make it!)

These bars are tasty, simple and fun! I may become a sugar cookie convert after all.

Sugar Cookie Bars

For the cookie bars:
1 cup (2 sticks) unsalted butter, at room temperature
2 cups sugar
4 large eggs
2 tsp. vanilla extract
5 cups all-purpose flour
1 tsp. salt
½ tsp. baking soda

For the frosting:
1 cup (2 sticks) unsalted butter, at room temperature
1 tsp. vanilla extract
Pinch of salt
4 cups confectioners’ sugar, sifted
5 tbsp. milk
Food coloring (optional)

To make the cookies, preheat the oven to 350˚ F. Grease a 13 x 18″ rimmed baking sheet. Combine the butter and sugar in the bowl of an electric mixer. Beat on medium-high speed until light and smooth, about 2 minutes. Mix in the eggs one at a time, beating well after each addition and scraping down the sides of the bowl as needed. Blend in the vanilla. In a medium bowl, combine the flour, salt and baking soda. Stir together with a fork to blend. Add the dry ingredients to the mixer bowl and beat on low speed just until incorporated.

Transfer the cookie dough to the prepared baking sheet and press into an even layer. Bake 10-15 minutes, until light golden brown and a toothpick inserted in the center comes out clean. Transfer the pan to a wire rack and let cool completely before frosting.

To make the frosting, place the butter in the bowl of an electric mixer. Beat on medium-high speed until smooth, about 1 minute. Blend in the vanilla, salt, and confectioners’ sugar until smooth, 1-2 minutes. Mix in the milk. Tint as desired with food coloring. Spread over the cookie in the pan, cut into bars and serve.

Crockpot Roasted Chicken

It's no secret that I adore my crockpot, so I was incredibly excited when I found this recipe for roasted chicken in the crockpot on my brilliant friend Lauren's blog. We love roast chicken, but I've never actually made one myself. For some reason cooking a whole bird in the oven for hours is intimidating to me, but this recipe sounded so easy there was no way I could resist. This is just a fantastic idea! It takes all of two minutes to prepare, and it smells amazing as it cooks. The result is a juicy, tender chicken with meat that just falls off the bone. We ate some of the chicken with mashed potatoes, veggies and rolls, then I used the leftovers in a pasta dish later in the week. You will definitely get more than one meal out of this! Feel free to get creative with the seasonings - I used a lemon pepper seasoning that was great, but I'd also like to try a more garlicky seasoning, or maybe a barbecue rub.

Crockpot Roasted Chicken

Whole chicken (4-5 pounds)
1/2 cup chicken broth
4 cloves garlic, peeled
Olive oil
Seasonings of choice

Prep the chicken- remove the bag from the inside, thoroughly washing out the cavity and outside of the chicken. Pat dry.

Roll 3 pieces of tin foil into balls, about 2 inches in diameter. Place them in a triangle shape on the bottom of the crockpot.

Pour the chicken broth into the bottom of the crockpot. Toss the garlic cloves, whole, into the broth.

Place the chicken on top of the tin foil. Rub a small amount of olive oil over the skin (about 1-2 teaspoons).

Season heavily with the seasonings of your choice, gently rubbing them into the skin.

Cook on low 8 hours.

Applesauce Bread

Every Sunday, I make a loaf of quick bread for Joe to eat during the week for breakfast. I usually just use a Pillsbury mix, because Joe really likes them, but every once in awhile I'll make something from scratch. This Applesauce Bread is one of my favorite loaves to whip up. It's easy and fast, and doesn't require any special ingredients. It's dense and soft and sweet. I always make two loaves and either freeze the second for a later date or serve it to guests (or eat it myself!). Definitely give this one a try! (The below recipe is for two loaves. The only thing I suggest is keeping an eye on the cooking time - the recipe says to bake for 80 minutes, but mine were done in 60.)

Applesauce Bread

3 cups all-purpose flour
3 eggs
2 cups white sugar
1 cup vegetable oil
2 cups applesauce
1 cup raisins (optional)
1 teaspoon ground cinnamon
1 teaspoon baking soda
1/4 teaspoon baking powder
1/2 cup sour cream

Preheat oven to 350 degrees F (175 degrees C). Grease and flour two 9 x 5 inch loaf pans. Beat together eggs, sugar, and oil. Blend in applesauce, and then sour cream or buttermilk. Mix in flour, baking powder, soda, and cinnamon. Stir in raisins. Pour batter into prepared pans. Bake for 80 minutes. Cool on wire racks.

Wednesday, April 28, 2010

Ranch Ham 'N' Cheese Pasta

While I've only recently expanded my culinary world to include pork tenderloin and pulled pork, the ham sandwich has always been a favorite of mine - I love me some deli ham. This Ranch Ham 'N' Cheese Pasta caught my eye because it uses ham, and I knew that Joe would like it because he is a fan of anything that includes sour cream. I found this recipe in Taste of Home Healthy Cooking magazine. I bought the magazine on a whim a few years ago and still make recipes from it often. The recipes are quick, low-fat and unique - I never would have thought the combination of flavors in this pasta would work, but they do! This pasta is fantastic - creamy and cheesy with a fantastic tangy taste. Plus, it came together in about 20 minutes, which was an added bonus!

I did make a few changes to the original recipe. I used only 8 ounces of pasta since just Joe and I were eating this. However I left all the other measurements the same and felt I still had a perfect pasta to sauce ratio. I left out the dill because I didn't have any, and also left out the Parmesan cheese because I felt the pasta just didn't need it.

Ranch Ham 'N' Cheese Pasta

1 package (16 ounces) penne pasta
1 tablespoon butter
1 tablespoon all-purpose flour
1 cup fat-free milk
2 teaspoons dried parsley flakes
1 teaspoon garlic salt
1 teaspoon salt-free lemon-pepper seasoning
1/2 teaspoon garlic powder
1/2 teaspoon dried minced onion
1/2 teaspoon dill weed
1/4 teaspoon onion powder
1/8 teaspoon pepper
1 cup (8 ounces) reduced-fat sour cream
2 cups cubed fully cooked lean ham
1-1/2 cups (6 ounces) shredded reduced-fat Mexican cheese blend
1/4 cup shredded Parmesan cheese

Cook pasta according to package directions; drain. In a Dutch oven, melt butter; whisk in flour until smooth. Gradually add milk and seasonings. Bring to a boil; cook and stir for 2 minutes or until thickened.
Reduce heat; fold in sour cream until blended. Add ham and pasta; cook and stir until heated through. Remove from the heat; stir in Mexican cheese blend until melted. Sprinkle with Parmesan cheese. Yield: 10 servings.

Nutritional Analysis: 1 cup equals 306 calories, 9 g fat (5 g saturated fat), 27 mg cholesterol, 612 mg sodium, 38 g carbohydrate, 2 g fiber, 20 g protein.

Tuesday, April 13, 2010

Cinnamon French Toast Bowl-a-Rama

Since I was enjoying my Hungry Girl 200 Under 200 cookbook so much, I decided to purchase her newest book, Hungry Girl 1-2-3. I was especially drawn to this book because it features a whole section of crockpot recipes, as well as a section of meals and treats you can make in the microwave. I decided to go the microwave route for the first recipe I tried from the book and made Cinnamon French Toast Bowl-a-Rama for breakfast. This is essentially a French toast bake that you make in a mug in the microwave. It's big and warm and filling and delicious! I love that it feels indulgent when it's totally not. The whole mug has only 228 calories and 21.5 grams of protein! Not only was it a decadent and sweet way to start the day, it kept me full for hours. The only changes I made were to use sugar-free french vanilla creamer in liquid form, since that's what I had on hand, and to reduce the amount of Reddi-wip and add a little more syrup instead. Make this for your breakfast tomorrow!

Cinnamon French Toast Bowl-a-Rama

2 tsp Coffee-mate Sugar Free French Vanilla creamer
2 tbs fat-free cream cheese, room temperature
3/4 tsp cinnamon
1/4 tsp vanilla extract
2 no-calorie sweetner packets (I used Splenda)
1/2 cup fat-free liquid egg substitute
2 slices light white bread
1/4 cup Fat Free Reddi-wip
1 tbs sugar-free pancake syrup

Combine powdered creamer with 1/4 cup hot water in a bowl and stir to dissolve. Add cream cheese, cinnamon, vanilla extract and sweetner and stir until mixture is smooth and free of lumps. Add egg substitute and stir. Set aside.

Toast the bread and tear into cubes. Spray a large microwave-safe mug with nonstick cooking spray. Add bread cubes and top with the vanilla-egg mixture. If needed, stir gently to ensure that bread is thoroughly soaked. (I added the bread to the bowl with my egg mixture, stirred it all up and added everything together to the mug.)

Microwave for 2 to 2 1/2 minutes, until just set. (Make sure your mug is big! This puffs up a LOT while cooking, but then deflates down once its done.) Allow to cool slightly.

Fluff mixture gently with fork. Top with Reddi-wip and drizzle with syrup. Enjoy!

228 calories, 3 g fat, 671 mg sodium, 31 g carbs, 6 g fiber, 6 g sugar, 21.5 g protein

Sweet!

I love to enter online contests, but I'm not very lucky with that type of thing and never really win anything. So I was super excited when I was announced as a winner of a jar of Bee Raw Honey from cool food blogger Blake of Blake Makes. I love me some honey, so I was excited to break right into my jar of Wild Raspberry honey when it arrived. I decided to try it out in my favorite way to eat honey - on toast with peanut butter. The honey was perfectly smooth and golden and the taste was fantastic! Sweet, of course, with just the slightest tang of raspberry. Delicious, and much better than the stuff you pick up at the grocery store (although I will always love you, Mr. Honey Bear). Thanks Blake and Bee Raw!

Thursday, April 1, 2010

Chicken Tamale Casserole

I'm a huge fan of any meal that I can make using a single dish, pot, etc. so this one caught my eye immediately. I also loved that it used corn bread mix, because who doesn't love cornbread? I snagged this recipe off of Deborah's blog, and I was even more sold on it when I realized it was a Cooking Light recipe! It was incredibly easy to put together. The only change I made was to use pre-cooked Perdue chicken slices and dice them up instead of cooking and shredding chicken. Joe and I both enjoyed this recipe, although we agreed that it could use a little crunch as the entire thing is very soft. Some crumbled tortilla chips on top next time, perhaps?

Chicken Tamale Casserole

1 cup shredded cheddar cheese, divided
1/3 cup milk
2 eggs
1 teaspoon ground cumin
1/8 teaspoon ground red pepper
1 (14 3/4 ounce) can cream style corn
1 (8.5 ounce) box corn muffin mix
1 (4 ounce) can chopped green chilies, drained
cooking spray
1 (10 ounce) can red enchilada sauce
2 cups shredded cooked chicken breast
1/2 cup sour cream (optional)

Preheat oven to 400°.

Combine 1/4 cup cheese and next 7 ingredients (through chiles) in a large bowl, stirring just until moist. Pour mixture into a 13 x 9–inch baking dish coated with cooking spray.

Bake at 400° for 15 minutes or until set. Pierce entire surface liberally with a fork; pour enchilada sauce over top. Top with chicken; sprinkle with remaining 3/4 cup cheese. Bake at 400° for 15 minutes or until cheese melts. Remove from oven; let stand 5 minutes. Cut into 8 pieces; top each serving with 1 tablespoon sour cream.

Friday, March 26, 2010

The Doctor is In

Tomorrow is Joe's annual fantasy baseball draft with his friends, and I always bake some sort of treat for him to bring along. I usually make Joe's favorite Kandy Kake bars, which was the plan for this year as well, but this morning I discovered that I was out of flour. I immediately turned to The Cake Mix Doctor Returns, a great cookbook given to me by my friend Lauren this past Christmas. I thumbed for through the book looking for a bar or cookie recipe that I had all the ingredients for and found this recipe for peanut butter chocolate bars. These were super simple to make and are really good - they taste like thick peanut butter cookies with chocolate frosting. Can't beat that!

Peanut Butter Chocolate Bars

1 package plain yellow cake mix (18.25 ounces)
1 cup smooth peanut butter
8 tablespoons butter (1 stick), melted
2 large eggs
1 package semisweet chocolate chips (12 ounces; 2 cups)
1 can sweetened condensed milk (14 ounces)
2 teaspoons pure vanilla extract

Place a rack in the center of the oven and preheat the oven to 350°F. Set aside an ungreased 13-by-9-inch baking pan.

Place the cake mix, peanut butter, melted butter and eggs in a large mixing bowl. Blend with an electric mixer on low speed for one minute. Stop the machine and scrape down the sides of the bowl with a rubber spatula. The mixture will be thick. Reserve 1 1/2 cups for the topping. Transfer the remaining crust mixture to the pan. Using your fingertips, press the crust evenly over the bottom of the pan so that it reaches all sides. Set aside.

For the filling, place the chocolate chips and condensed milk in a microwave safe bowl and microwave 1 minute. Stir until smooth, then stir in vanilla. Spread mixture evenly over crust in pan. Using your fingertips, crumble the reserved crust and scatter it evenly over the chocolate. Place the pan in the oven.

Bake 30-35 minutes until edges are golden. Remove the pan from the oven and place it on a wire rack to cool for 30 minutes.

Turkey Goulash

Charlie and Lily keep me pretty darn busy all day, so I don't have much time to peruse other food blogs like I used to. Thanks to the recent purchase of my beloved BlackBerry Curve, however, I am now able to quickly browse through my Google Reader here and there to search for new recipes. One blog that I always read is Fake Ginger. I love Amanda's recipes, her funny and honest description of things, and her ability to cook or bake something new almost daily while caring for two small children. I found this turkey goulash recipe on Amanda's blog recently and immediately printed it out. It sounded quick, hearty and tasty so I was eager to make it. I had planned to cook this during the babies' afternoon nap today, but I am in the midst of reading The Girl With the Dragon Tattoo and decided that I would rather devote my small amount of free time to that today rather than standing over the stove. So I modified this recipe for the crockpot. I took 10 minutes to throw it together in the morning and had a hot, delicious dinner simmering away while I read. My changes are below - check out Amanda's blog for the original!

Turkey Goulash

1 teaspoon olive oil
1 pound ground turkey
1 onion, diced
2 garlic cloves, minced
2 cups water
1 (15-ounce) can tomato sauce
1 (15-ounce) can diced tomatoes
1 1/2 teaspoons Italian seasoning
1 tablespoon soy sauce
1 bay leaf
1/4 teaspoon black pepper
1/4 teaspoon salt
2 cups elbow macaroni or small shells

Heat olive oil in a skillet over medium high heat. Saute turkey, onion, and garlic until turkey is cooked through and onion is soft. Place turkey mixture in crockpot and add water, tomato sauce, diced tomatoes, Italian seasoning, soy sauce, bay leaf, black pepper, and salt. Cook on low 6-8 hours. Add pasta, stir well and replace lid for 10 mintues or until pasta is tender. Remove bay leaf before serving.

Monday, March 22, 2010

Oatmeal Insanity

I've been a fan of Hungry Girl for years. I get her daily emails and seek out her television appearances, but I never bought any of her books. I was certain that I would never make anything from them and they would just collect dust. Slowly, however, I felt the urge to buy the books creeping up. My friend Lauren has a few and has made several delicious recipes from it, so I started to get tempted. What really sent me to Amazon, though, is the fact that I was getting really bored with my breakfast of Special K and my lunch of toast or frozen waffles. I wanted a variety of healthy and easy meals to choose from for breakfast and lunch, so I purchased Hungry Girl 2oo Under 200 (and her newest book, which should be shipping this week) and I'm so glad I did! I've already made a few things and have many more bookmarked. I did have to make a trip to the store to purchase some of her most used ingredients - I Can't Believe It's Not Butter, Flatout Wraps, Egg Beaters, etc. - but many of the things used I already had. I chose Complete and Utter Oatmeal Insanity for my first recipe because it called for pumpkin, and I love me some pumpkin. This oatmeal is so, so good! It's sweet and hearty and comforting - plus the serving is huge! I left out the Reddi-wip because I didn't have any, but I don't think you need it. If you're looking for a unique and delicious breakfast treat, this is it!

Complete and Utter Oatmeal Insanity

1 packet plain instant oatmeal
1/4 cup Fiber One cereal (original)
1/4 light vanilla soymilk (I used skim milk)
2 tablespoons canned pumpkin puree
2 tablespoons Fat Free Reddi-wip (I omitted)
1 tablespoon sugar-free pancake syrup
1/4 teaspoon pumpkin pie spice
5 sprays I Can't Believe It's Not Butter Spray
1 no-calorie sweetner packet
Dash salt

Place all ingredients except Reddi-wip in a medium microwave-safe bowl. Add 1/4 cup water and stir. Micrwoave 45 seconds, then mix well. Microwave for an additional 30-40 seconds. Allow oatmeal to thicken before removing from microwave. Add Redd-wip and stir well.

Irish Potato Candy

After making my Irish soda bread, I had St. Patrick's Day fever and wanted to make something else. I knew I wanted something sweet, so I settled on this Irish Potato Candy. This was yummy. Really, really yummy. And easy to make. I read a lot of the reviews before getting started and followed the suggestions that kept appearing again and again (my changes are reflected in the below recipe). I halved the amount of powdered sugar, using only 2 cups rather than the 4 cups called for and the consistency was perfect. I chilled between steps - before rolling and before coating - and had no problem handling or molding the treats. Finally, I rolled the candies in a mixture of cinnamon and a hot cocoa packet - the coating was delicious and not at all over powering. After eating a few too many myself I sent the remainder to school with Joe where they were a big hit! I definitely plan to make these again - I'm already thinking about how I can use food coloring in the candy to make Easter eggs!

Irish Potato Candy

1/4 cup butter, softened
4 oz cream cheese, softened
1 tsp vanilla extract
2 cups powdered sugar
2 1/2 cups flaked coconut
1 teaspoon cinnamon
1 packet hot cocoa mix

In a medium bowl, beat the butter and cream cheese until smooth. Add the vanilla and powdered sugar; beat until smooth. Mix in coconut. Chill mixture in refrigerator 60 minutes or until firm. Shape into potato or ball shapes. Place on cookie sheet and chill 30 minutes. Mix together cinnamon and hot cocoa mix in a shallow dish. Roll candies in cinnamon mixture.

Monday, March 15, 2010

Creamy Orzo with Chicken and Feta

It's been awhile since I've cooked anything new. Since time is so limited these days I've been turning to quick and easy old favorites. But recently several new recipes have caught my eye and I'm determined to try them out. This delicious orzo dish is the first. I found this on Confections of a Foodie Bride's blog and bookmarked it immediately. It had a bunch of my favorite things - orzo, sun-dried tomatoes, cheese - and required very little prep work. Sold! The only change I made was to use feta in place of goat cheese. Joe does the shopping and I was afraid that if I asked him to buy goat cheese he'd balk and refuse to eat this dish, so I went with the more familiar feta. This meal was delicious! I loved the creamy orzo combined with the tangy tomatoes and cheese. This will definitely be added to the "quick and easy old favorites" list!

Creamy Orzo with Chicken and Feta

1 lb orzo
1 lb chicken breast, cut into 1-inch pieces
1/2 cup sun-dried tomatoes, chopped
6 oz feta or goat cheese, crumbled
2 tsp fresh thyme leaves
Juice of half a lemon (about 2 teaspoons)
4 cups chicken broth
3/4 cup water
2 tbsp unsalted butter, divided
1 tsp salt
1/4 tsp ground pepper
3/4 cup Parmesan, grated
3/4 cup Panko

Preheat oven to 400. Add orzo, chicken, sun-dried tomatoes, thyme, lemon juice and feta to a 2.5 - 3 quart baking dish. Bring chicken broth, water, 1 tbsp butter, salt and pepper to a boil on the stove. Pour into baking dish, stirring slightly to mix. Bake for 30 minutes.

Mix Parmesan and Panko. Melt remaining 1 tbsp butter and mix into Parmesan and Panko mixture. Sprinkle mixture on top of orzo dish and and bake for 7-10 minutes more until bubbly. Let sit 5 minutes before serving.

Irish Soda Bread

I am a fan of bread. I love all breads and bread-like items, and Irish soda bread is no exception. This past weekend my mom's neighbor baked her a loaf of soda bread and my mom shared a slice with me. Yum! That was all it took to send me to the kitchen to make a loaf of my own. A few years ago I worked with a lovely woman from Ireland who gave me her recipe for Irish soda bread which I've made and enjoyed in the past. Of course, today I couldn't find it, so I hit the Internet to find a substitute an All Recipes. I went back and forth between this recipe and the one I ultimately chose for a while, but went with the latter for two reasons. 1 - it seemed more "traditional" to me since it was shaped into a rustic loaf rather than baked in a bread pan and 2 - the first recipe said the resulting bread tasted best if you let it sit for several hours to a day, and really, who can let fresh baked bread sit?!?

I'm happy I chose the recipe I did. It came out beautiful and delicious! The wash of buttermilk and melted butter on top makes a nice, slightly sweet crust. I brushed the loaf once before baking and once in the middle of baking and had a ton of butter/buttermilk left, so you can definitely reduce the amount if you want to avoid waste. I added raisins because to me, Irish soda bread needs raisins! I also made my own buttermilk substitute by adding 1 tablespoon lemon juice to 1 cup of milk and letting it sit for 5 minutes. I will definitely bake up this bread again!

Amazingly Easy Irish Soda Bread

4 cups all-purpose flour
4 tablespoons white sugar
1 teaspoon baking soda
1 tablespoon baking powder
1/2 teaspoon salt
1/2 cup margarine, softened
1 cup buttermilk
1 egg
1/4 cup butter, melted
1/4 cup buttermilk

Preheat oven to 375. Lightly grease a baking sheet.
In a large bowl combine flour, sugar, baking soda, baking powder, sat and margarine. Stir in 1 cup buttermilk and egg. Turn dough out onto lightly floured surface and knead slightly. Form dough into a round and and place on prepared baking sheet. In a small bowl combine 1/4 cup melted butter and 1/4 cup buttermilk; brush loaf with mixture. Use a sharp knife to cut an "x" in the top of loaf.
Bake in preheated oven for 45 to 50 minutes or until toothpick inserted in center comes out clean. You may brush the loaf with more buttermilk/butter mixture during baking if desired.


Sunday, March 7, 2010

Rolos Cake

This cake came about as the result of a snow day. There is just something about snowy days that make me want to bake. I needed something quick and easy, so I turned to a boxed cake mix and canned frosting that I could jazz up. Rather than make a regular old layer cake, I mixed up my chocolate cake mix with some chocolate chips and poured half of the batter into a bundt pan. I then sprinkled on a layer of chopped Rolos and then poured in the rest of the batter. After baking, cooling and removing from the pan I melted some chocolate frosting and drizzled it over the top of the cake. The result? YUM! Chocolate, caramel, gooey fudgy frosting - perfect for hibernating indoors as the snow fall. Hopefully though, the next thing I make will be spring inspired, as I'm hoping we are through with snow for the season! Even though they result in delicious desserts like this one, I've had enough of winter storms.

Rolos Cake

1 box chocolate cake mix + ingredients to make cake
1 cup semi-sweet chocolate chips
3 rolls Rolos candy, chopped
1/2 can chocolate frosting, melted

Preheat oven to 350. Grease bundt pan and set aside. Prepare cake according to package directions and stir in chocolate chips. Pour half of batter into prepared bundt pan. Sprinkle chopped Rolos over batter, then top with remaining batter. Bake 45 minutes or according to package direction for pan size. Cool completely before removing from pan. Drizzle with melted frosting.

Friday, February 26, 2010

Caprese Salad

So easy, yet so delicious! My mother-in-law Anne's birthday was last week, and this past Saturday Joe and I invited Anne and my father-in-law Fred over for dinner to celebrate, along with my brother-in-law John and his girlfriend Rebecca. Knowing that Joe and I don't have much time these days to cook, John and Rebecca graciously offered to bring dinner and dessert. John made his amazing homemade ravioli, meatballs and sauce, and Rebecca whipped up a delicious tiramisu (get the recipes on their blog!). I wanted to contribute something, so I decided to make an easy salad. I was planning on doing something plain with lettuce, but the night before dinner while feeding the babies at 2:00 am I for some reason decided I wanted to do a caprese salad (who knows why I decide what I do at 2:00 am?). I don't really even like tomatoes, but for some reason I wanted to go with caprese. I had Joe pick up the ingredients for me at the store, and when he returned with basil I saw that there was a recipe for caprese salad on the bag. I had just been planning to put sliced tomatoes, mozzarella and basil leaves on a plate, but this recipe jazzed it up a bit. And it was delicious! I had three servings of it, and as I said, I don't really like tomatoes. It was a great addition to our Italian feast!

Caprese Salad

2 large tomatoes, sliced
Fresh mozzarella, sliced
Basil leaves
1 garlic clove, finely minced
Salt and pepper
Extra virgin olive oil
Balsamic vinegar

Place tomato and mozzarella slices on plate and arrange basil leaves in between and on top of slices. Sprinkle with salt and pepper, and top with minced garlic. Drizzle olive oil and balsamic vinegar on top before serving.

Monday, February 1, 2010

Marshmallow Swirl Brownies

To help make ends meet, I recently became a Pampered Chef consultant. I've really been enjoying the job - it's so fun to do parties, meet new people and play with cool Pampered Chef products. I'm always on the hunt for easy and delicious recipes to demo at my parties, and this one from Pillsbury fit the bill! I came across the recipe on a box of Pillsbury brownie mix and figured that no one could resist the combination of chocolate and marshmallow. I mean really, is there anything better than marshmallow fluff? Give these a whirl - they are fantastic and super easy!

Marshmallow Swirl Brownies

Cooking Spray
1 pkg fudge brownie mix
1/2 cup vegetable oil
1/4 cup water
2 large eggs
1 (7 oz) jar marshmallow creme
1/3 cup chocolate frosting

Heat oven to 350. Prepare brownies as indicated on package with oil, water and eggs. Cool completely.

Spread a thin layer of marshmallow creme over brownies. Place frosting in microwave-safe bowl and microwave on high for 10-20 seconds. Stir until smooth. Drizzle frosting over marshmallow creme. Swirl with knife.

Refrigerate 15 minutes. To cut cleanly, spray a knife with non-stick cooking spray as needed. Store loosely covered in the refrigerator.

Pasta Bake with Sausage, Spinach and Beans

I'll admit it - I was naive. Before I had my babies, I totally used to judge women who said that they didn't have time to do things once they had their babies. Women who said that they couldn't find the time to work out? "Please!" I'd think. "You can totally get up early and exercise, or do it at night after the kids go to bed." Um, yeah, right. I now know that when you spend half the night up soothing and feeding babies the last thing you want to do is get up at 5:30 am and work out. There is also no way that you have the energy for a workout at 8:00 pm once the babies are finally in bed. I also used to laugh at women who said they had no time to cook once they had their babies. "Ha!" I thought. "You can't find half an hour a day to throw dinner together?!?" Um, no, on many days, you can't. For the past few months Joe and I have been living on takeout, standby crockpot recipes, frozen salmon filets with tater tots and meals kindly provided by family members. Luckily, as the babies get a little older we have more of a routine established and I have managed to find time to cook some decent dinners recently.

The first thing that I was eager to try came from the Cook Yourself Thin cookbook. This spring while I was on bedrest, Cook Yourself Thin aired every day at 5:00 and 5:30 on Lifetime. Since I wasn't allowed to leave the couch, I watched it religiously. I always thought that the recipes looked great and I vowed that I would get the cookbook once I had the babies. The book was under the Christmas tree for me this year, and this recipe for Pasta Bake with Sausage, Spinach and Beans was the first I tried. I made a few changes - I used spinach instead of the broccoli the recipe called for because Joe dislikes spinach less than he dislikes broccoli, and I used a sun-dried tomato and mozzarella chicken sausage in place of the turkey sausage.

This pasta was really, really good! I love the addition of the beans, and it was deliciously creamy with a nice crunchy crust on top. I'm anxious to try more recipes from the cookbook as soon as I get another chance!

(Blogger hates me right now and won't let me copy the recipe to this post, so please use the direct link until I can get it pasted!

The reasons for my lack of cooking - Charlie and Lily, 7 months old!